Setting Up Firewall Rules
Firewall rules are the one of the basic fundamentals of networking. They are a set of rules that a firewall will follow when data flows through the firewall. The firewall can reject, block, or accept data according to the rules.
pfSense’s WebGUI makes creating firewalls easy and straightforward. In this guide, I will show you how to create and edit firewall rules for your pfSense.
You will need to know a bit of networking fundamentals in order to configure firewall rules correctly.
Firewall Rule Tab
The firewall rules tab in pfSense can be found by selecting the Firewall drop-down, then select the Rules tab.

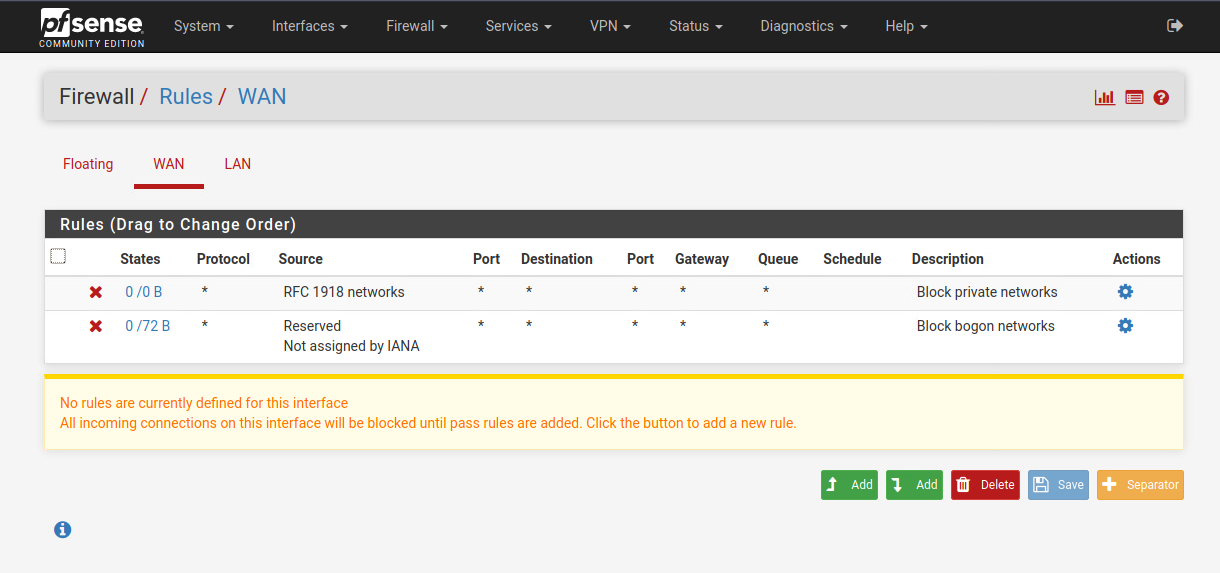
You will see the firewall rules page for the WAN interface. As you can see, there are two rules already created by default that blocks private and bogon networks on the WAN interface.
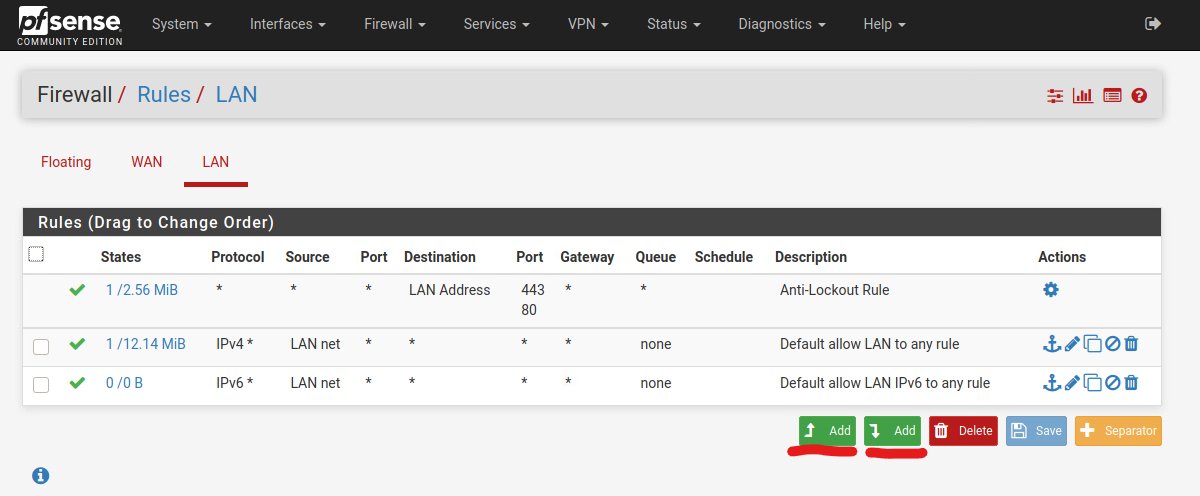
pfSense’s default firewall behavior is to block all traffic unless a firewall rule explicitly allows it. In the LAN tab, there are the default allow rules that allows traffic to pass through the firewall.
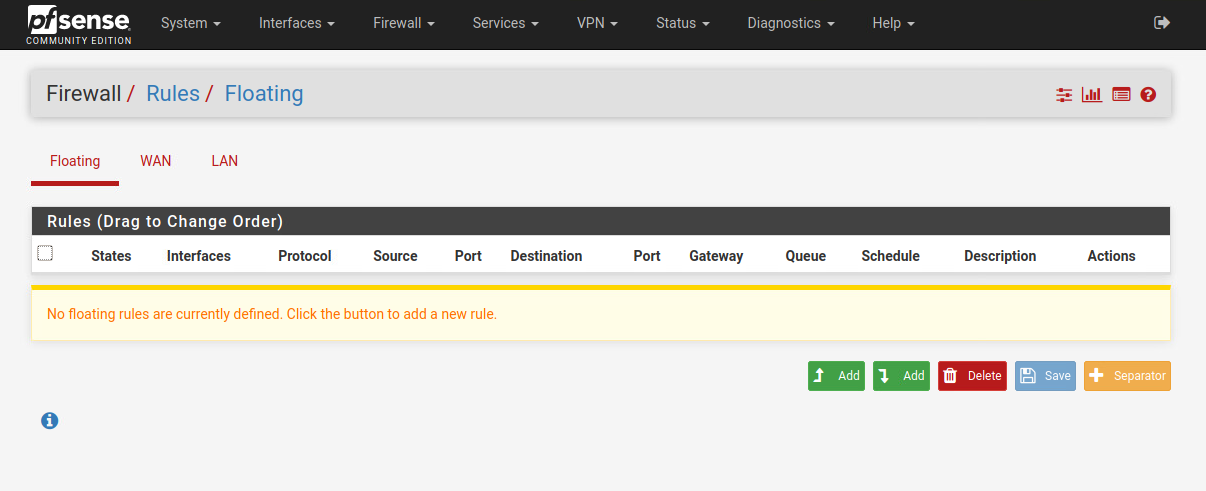
The floating tab are for rules that can affect more than one interface at once. Generally for the average user, you won’t be needing any floating rules.
You can change between the interface’s firewall rules by clicking on the appropriate interface tabs.

Adding Firewall Rules
To add an firewall rule, go to the interface that you want to add the firewall rule to, and select the Add button. The left Add button will create the firewall rule to the top of the firewall list and the right Add button will create the firewall rule to the button of the list.
Filling out the fields is pretty straight forward.
The Action field have the options Pass, Block, or Reject. Pass allows traffic to pass through the firewall interface. Block will silently drop the traffic when it arrives, preventing it from passing though the firewall interface. Reject will also drop the traffic, but will send a reply back to the sender that the traffic was rejected.
The Interface field will show all the possible interface that the firewall rule can be placed on.
The Address Family may be IPv4 or IPv6 or IPv4+IPv6. Currently, most network out there are still on IPv4, so this will be more applicable in most cases. You can always default to IPv4+IPv6 to cover both IPv4 and IPv6 traffic.
The Protocol is what kind of protocol the traffic you want to Pass/Block/Reject is. Typically, the most commonly used options will be TCP or UDP.
The Source section is where the traffic is coming from.
The Destination section is where the traffic is heading toward to.
For any firewall rules, it is always a good idea to put a description about what it does so that you can reference back to it quickly.
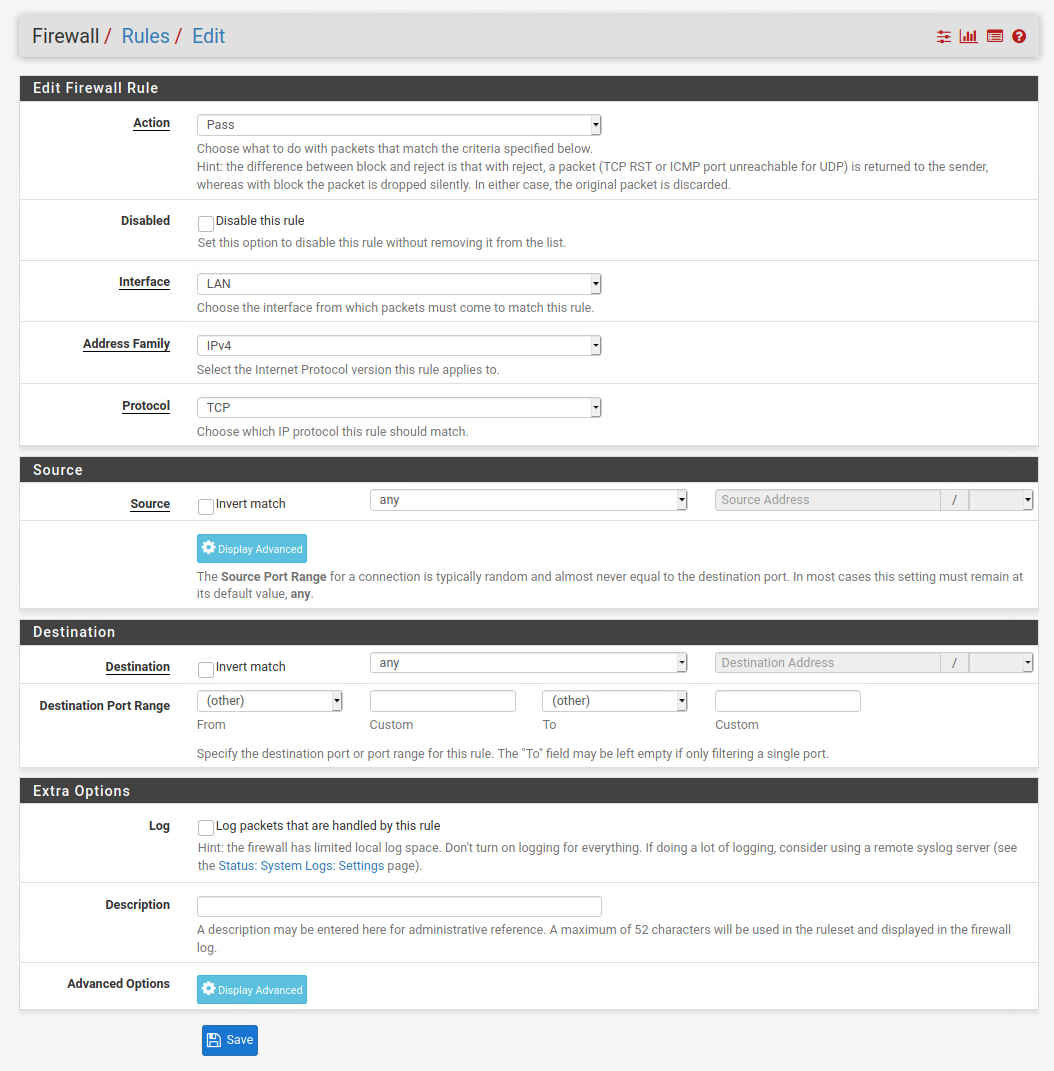
Below is an example firewall rule that I created:

Click Save to save the rule. Afterwards, click Apply Changes. The rules will not apply until you click the Apply Changes.
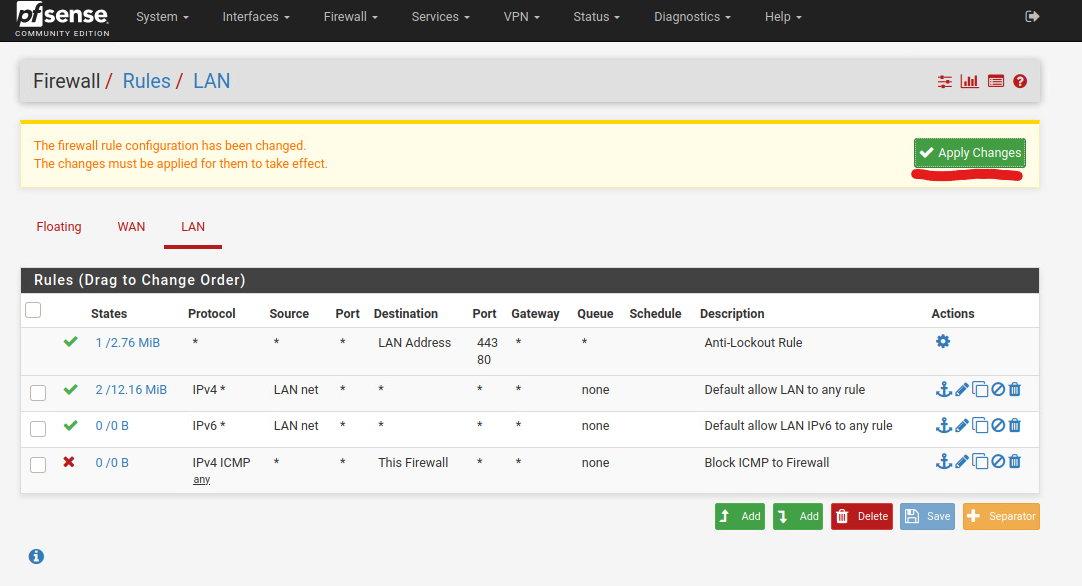
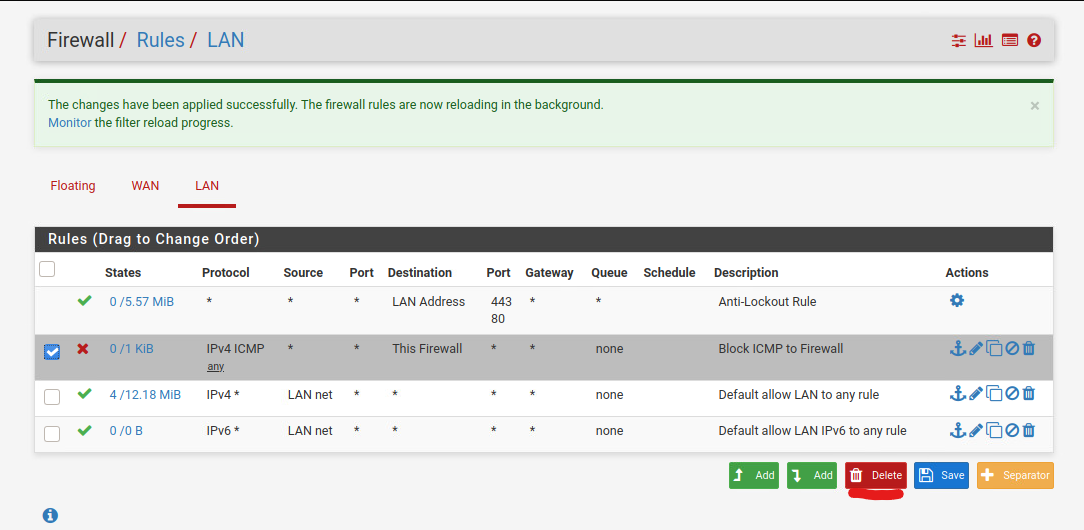
To understand what a rule does, read the rule from left to right. The green check symbol means Pass and the red cross symbol means Block. The asterisk means Any. The above example rule I created is read as Block IPv4 ICMP (ping) traffic from Source of Any IP and Any Port to Destination of This Firewall at Any Port.
FIREWALL RULES ORDERING ARE VERY IMPORTANT!!!!
Firewall rules ordering are very important in pfSense. pfSense follows the first-match behavior when determining which firewall rule to follow and enforce. It will process rules from top to bottom, and stop processing more rules once the first matching rule is found.
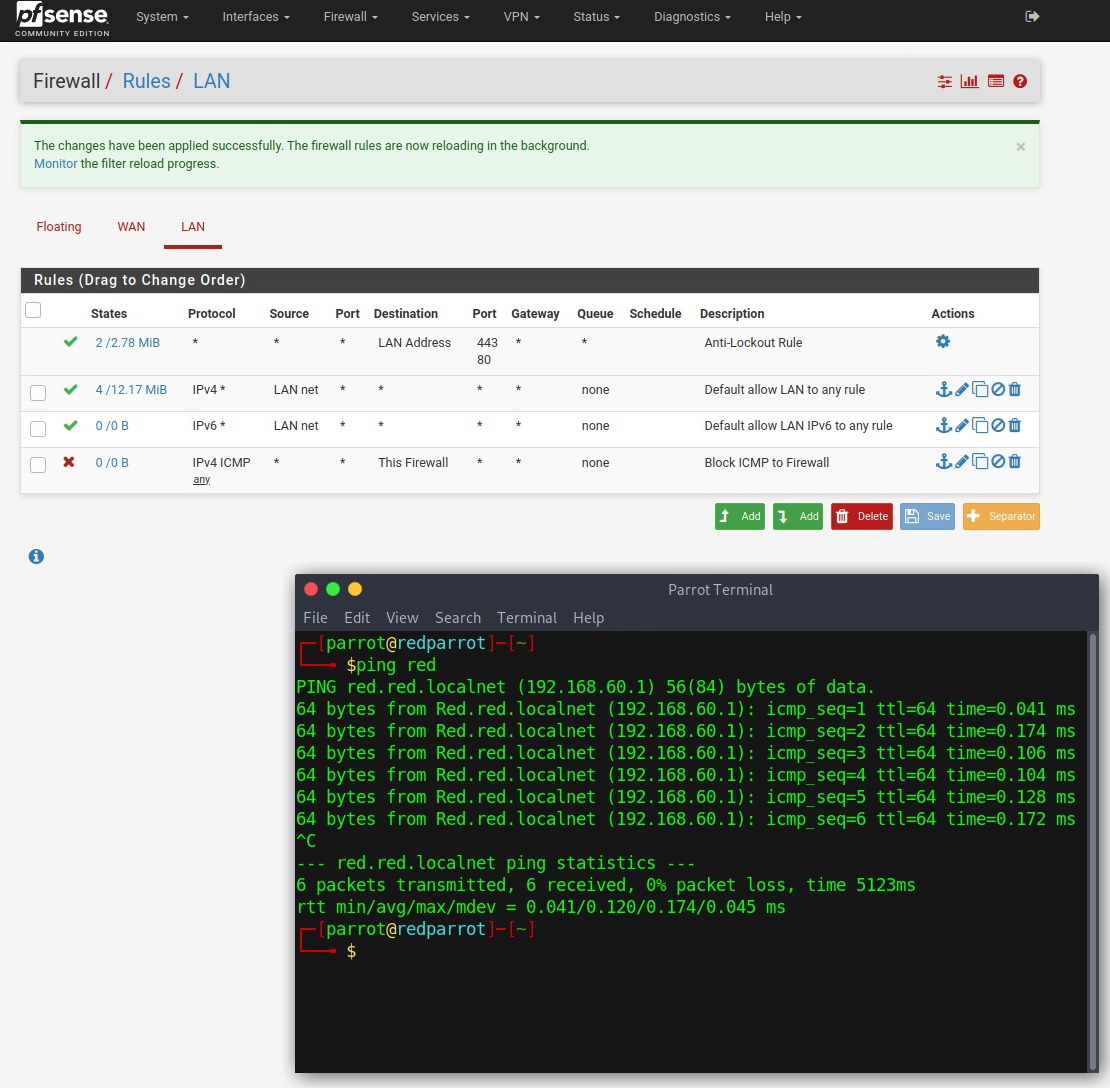
In my above example, I have my newly created rule saved and applied at the bottom of the rule set. However, right above that rule are two Pass rules that passes all LAN network traffic to any destination. Because of this, any ping to the firewall will be allow through due it the two Pass rules being set before the Block rule. As you can see above, my test client was able to ping the firewall despite having a block rule set.
Changing firewall order is as easy as dragging the rule up or down, then clicking Save.

Once the rules are ordered correctly, the block rule will apply and drop all ICMP (ping) traffic to the firewall, as shown below.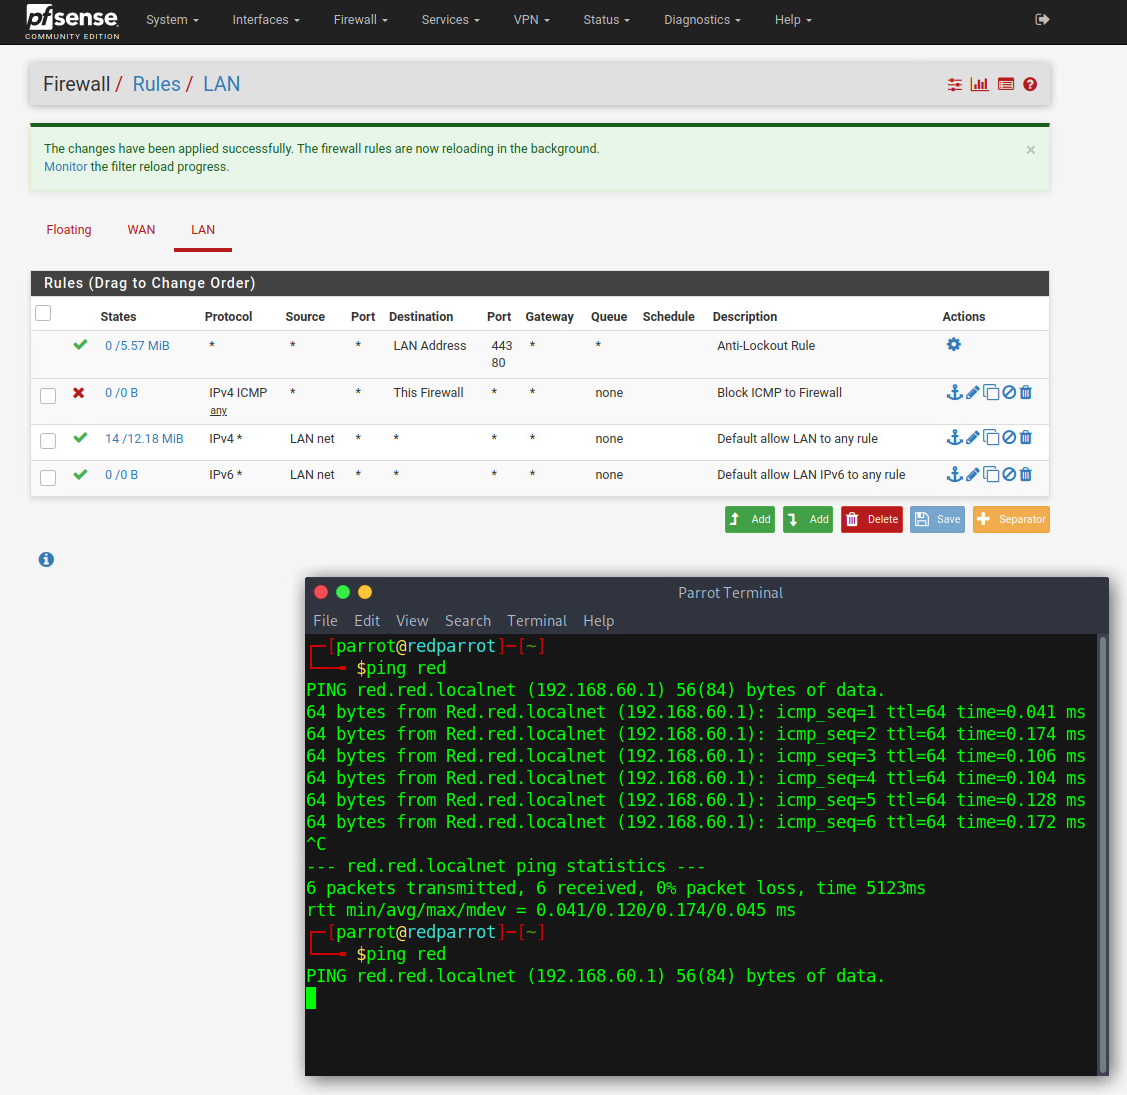

For pfSense, always order the most restrictive or most specific firewall rules at the top, and the most relax or most board rule at the bottom. This will allow the firewall to effectively filter incoming traffic according to your rule set.
Deleting a Rule
To delete a rule, simply check the check box next to the rule, and click Delete and confirm OK.