Configuring pfBlockerNG for WAN Malicious Blocking
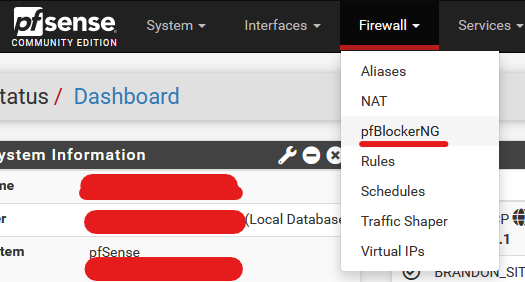
Login to pfSense, and head over to Firewall->pfBlockerNG.
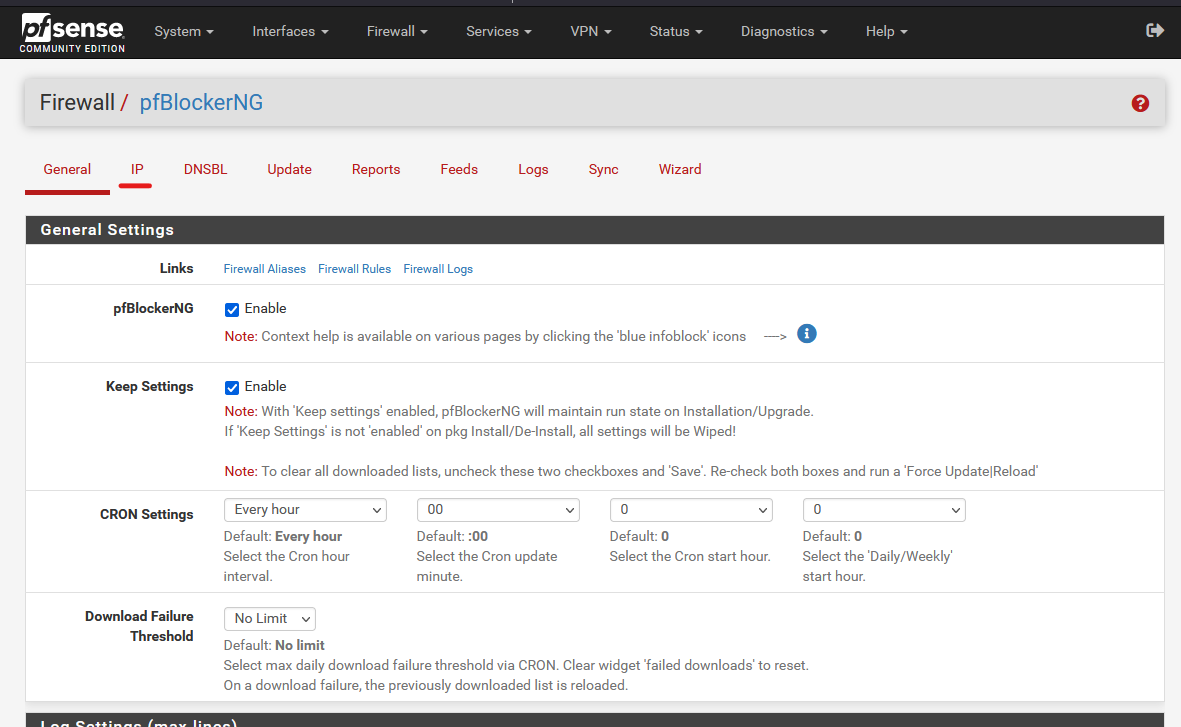
Go to the IP Tab.
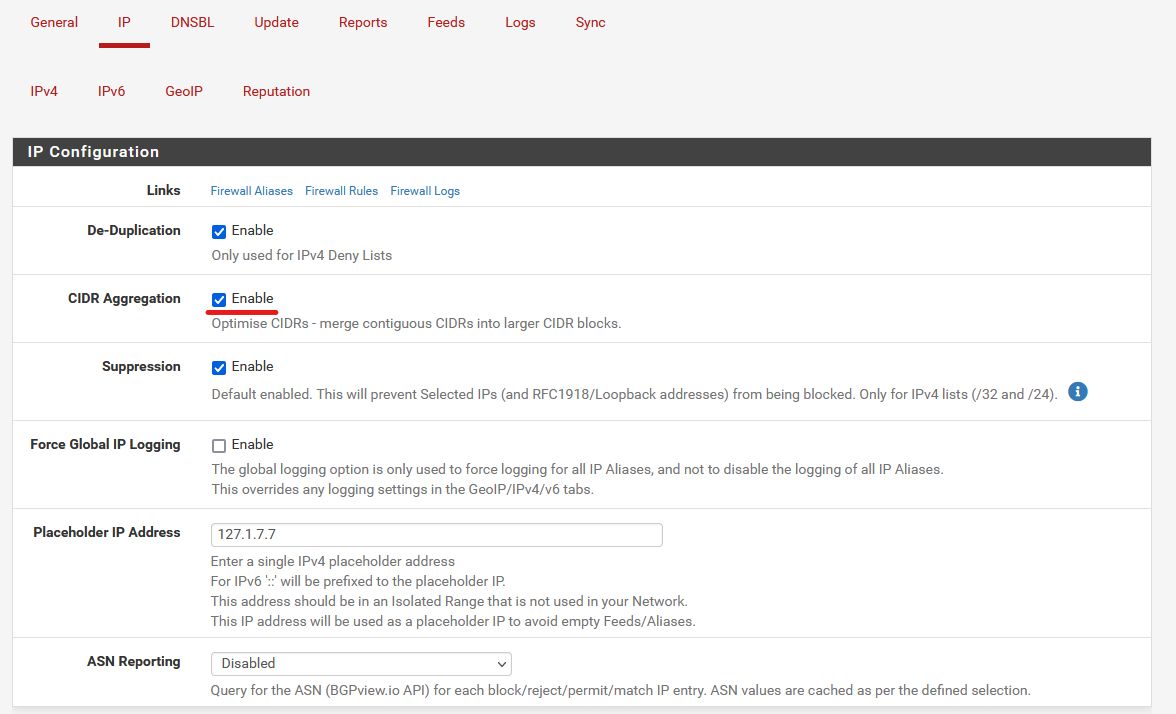
Check that CIDR Aggregation is Enable. This will optimize the block list in the long run.
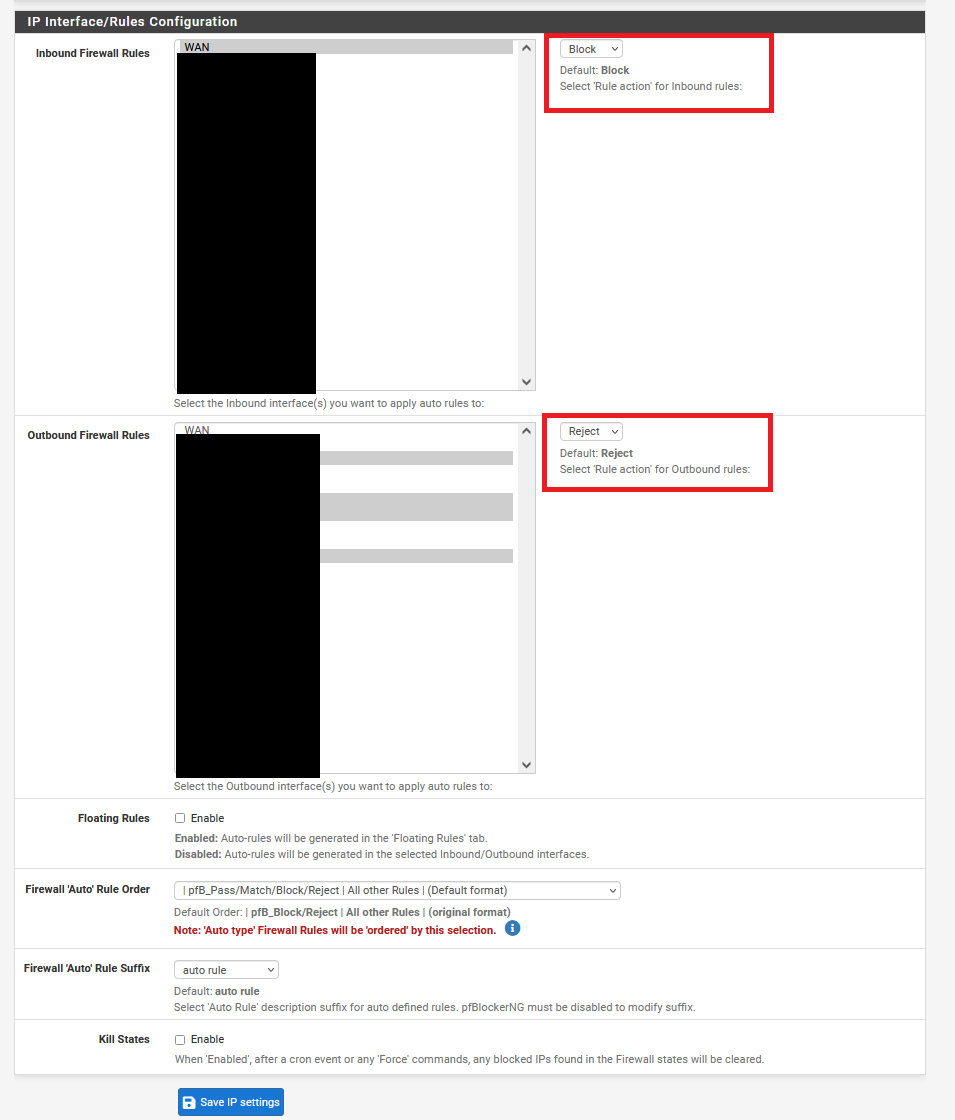
Make sure Inbound Firewall Rules is set to WAN, and is default to Block. For Outbound Firewall Rules, choose the LAN interfaces, and this can be set to Reject instead of Block.
Save IP Settings when finished.
Check that Kill States is enabled. This will kill existing connections that are connecting to an IP in the Feed-list upon feed updates and reloads.
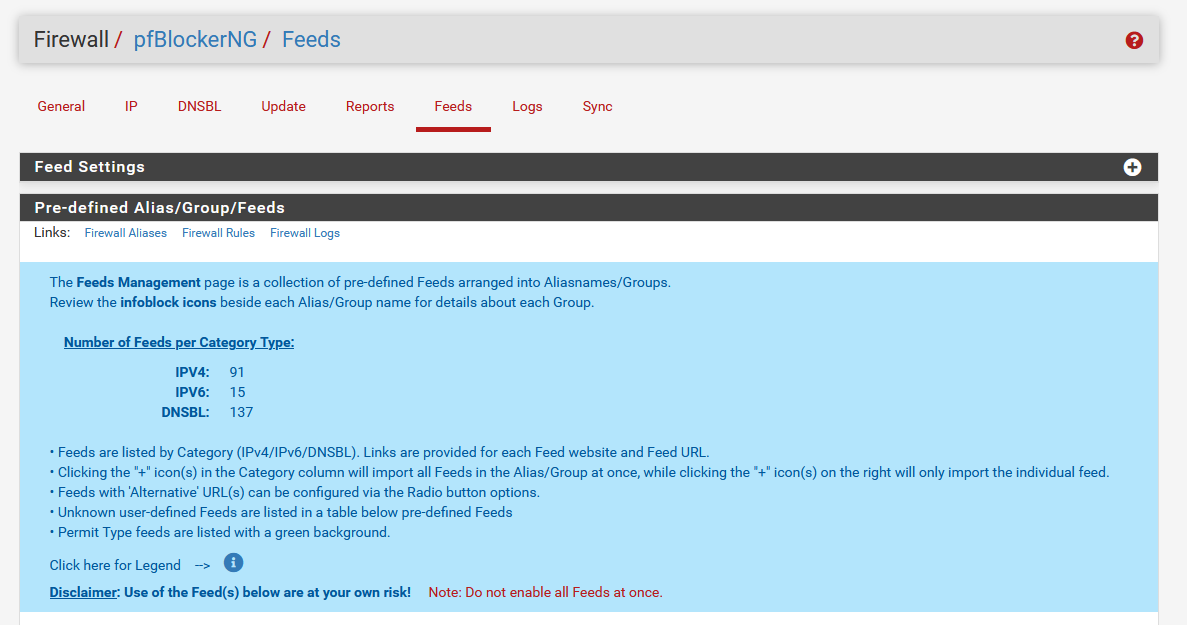
Next, head over to Feeds tab. This is where you can select from a list of possible feeds to add to pfBlockerNG. pfBlockerNG will refer to the DNS and IPs listed in those Feeds and block any traffic that matches the DNS or IP in the feed.
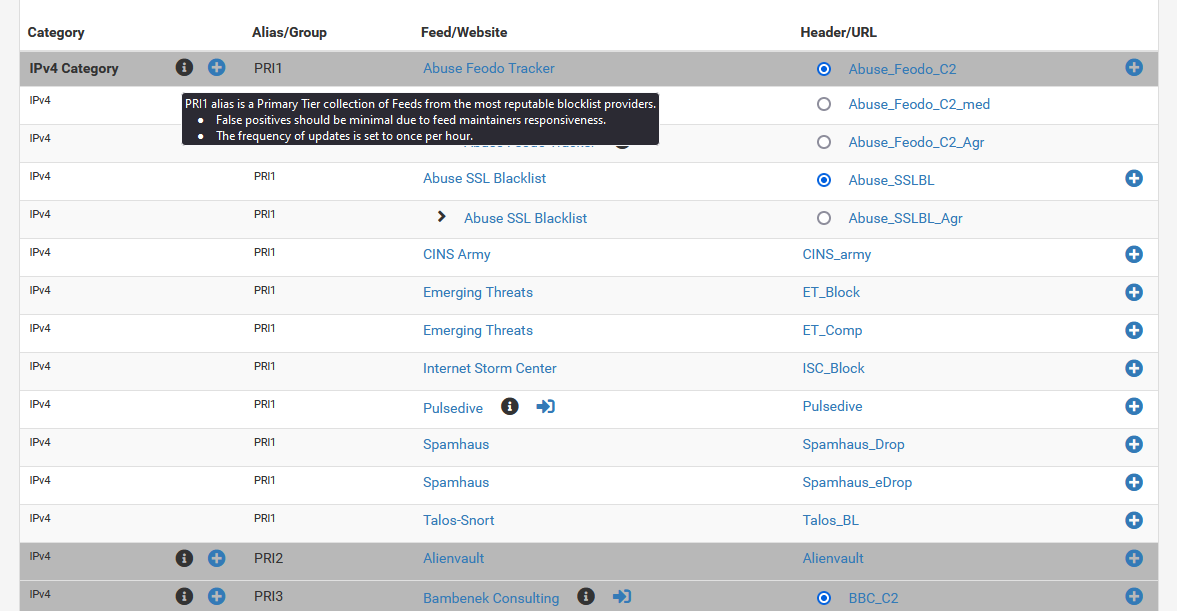
Choose your Feeds carefully. Some feeds may contain more false positive than others. You can hover over the information icon next to the categories to find out more information on them.
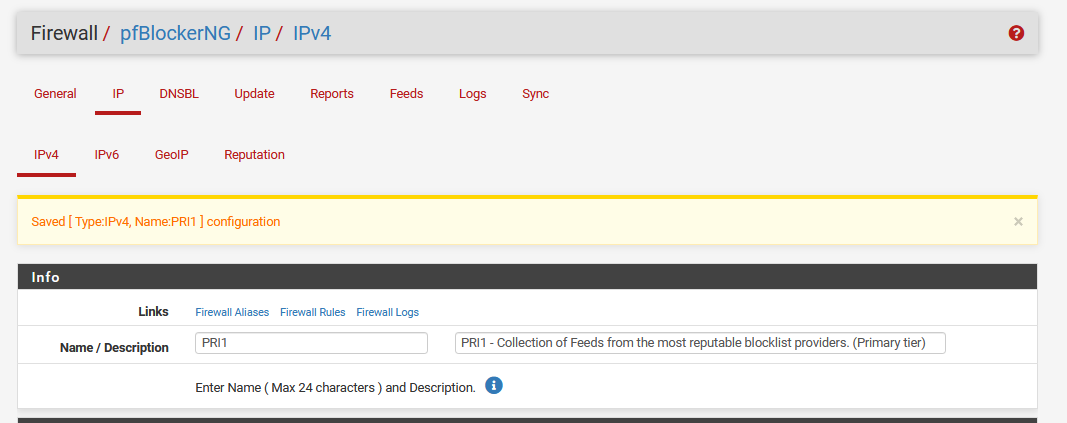
For WAN Malicious Blocking, I use the PRI1 group as it contains minimal false positives.
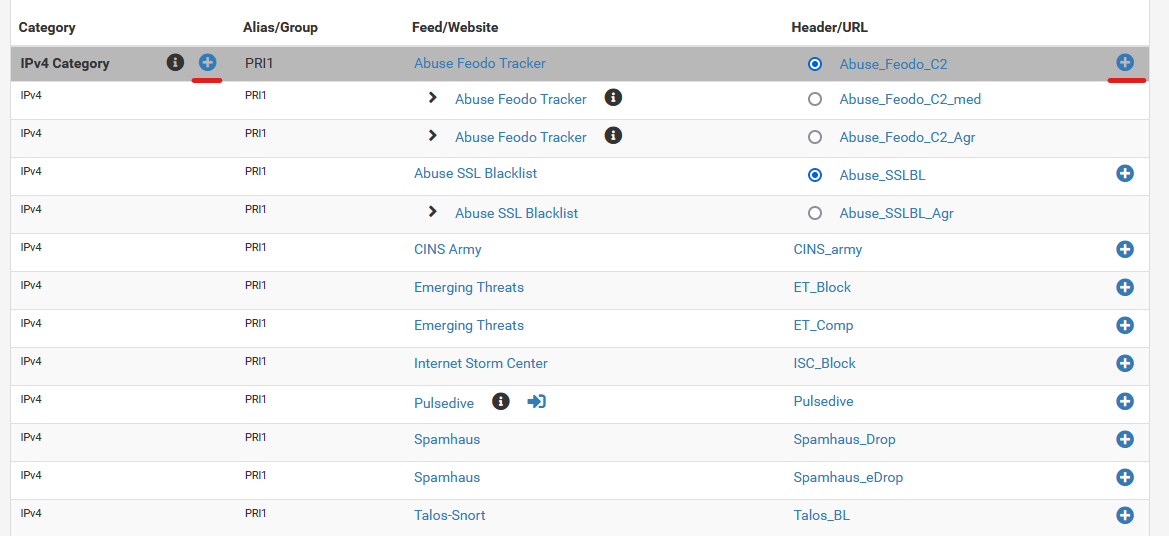
Click on the plus sign on the right to add individual feed, or click on the plus sign on the left to add the entire group of feeds.
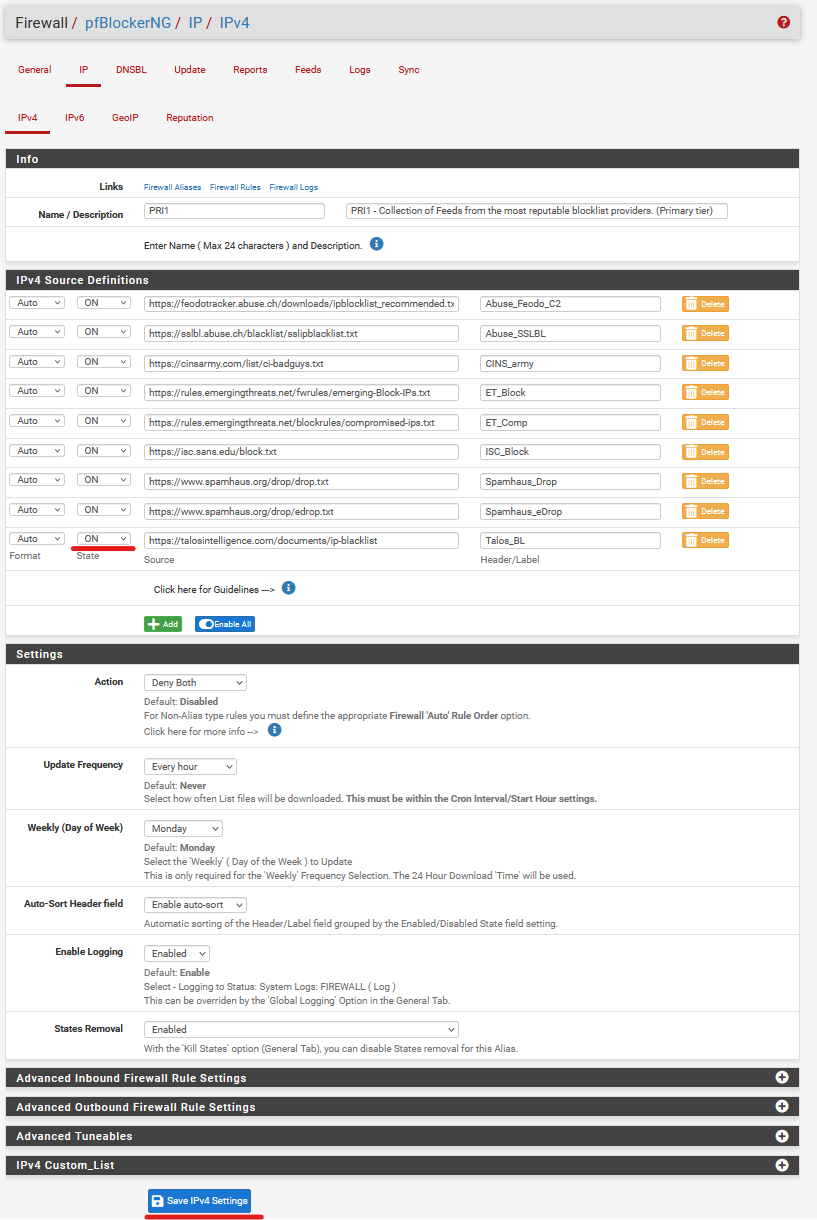
Make sure each Feed is set to On so that pfBlockerNG will pull down data from the feeds. Click Save IPv4 Settings.
Note that the Pulsedive feed-list will require an API key. You can remove the feed if you do not have the API key.
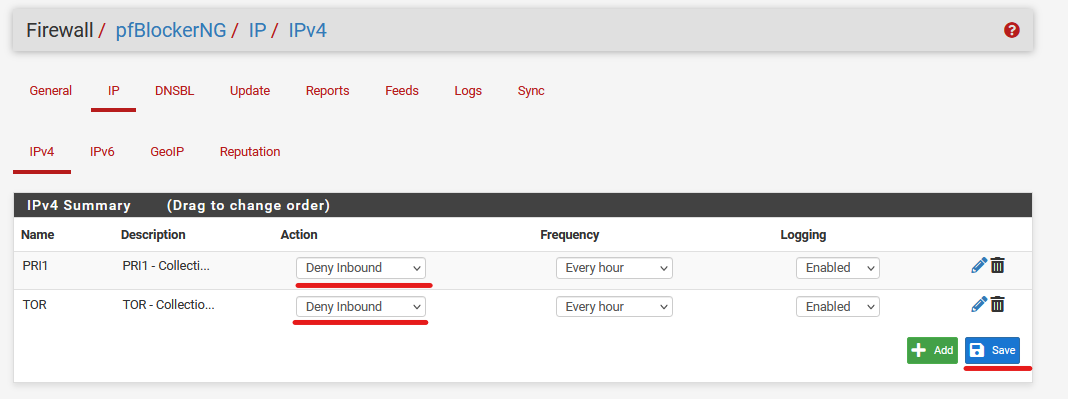
Go back to the IPv4 tab. Under Action, select Deny Inbound, and Save.
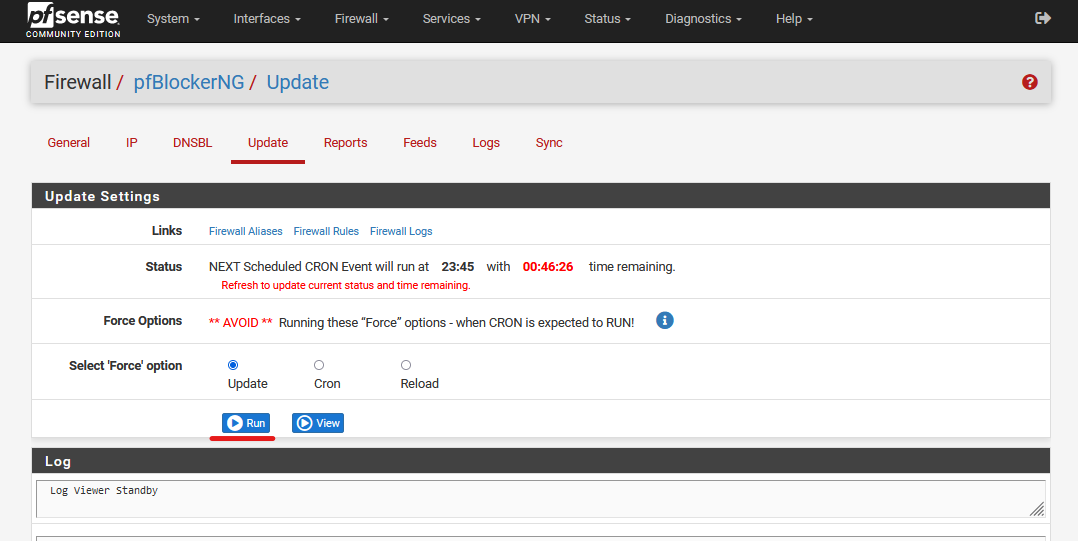
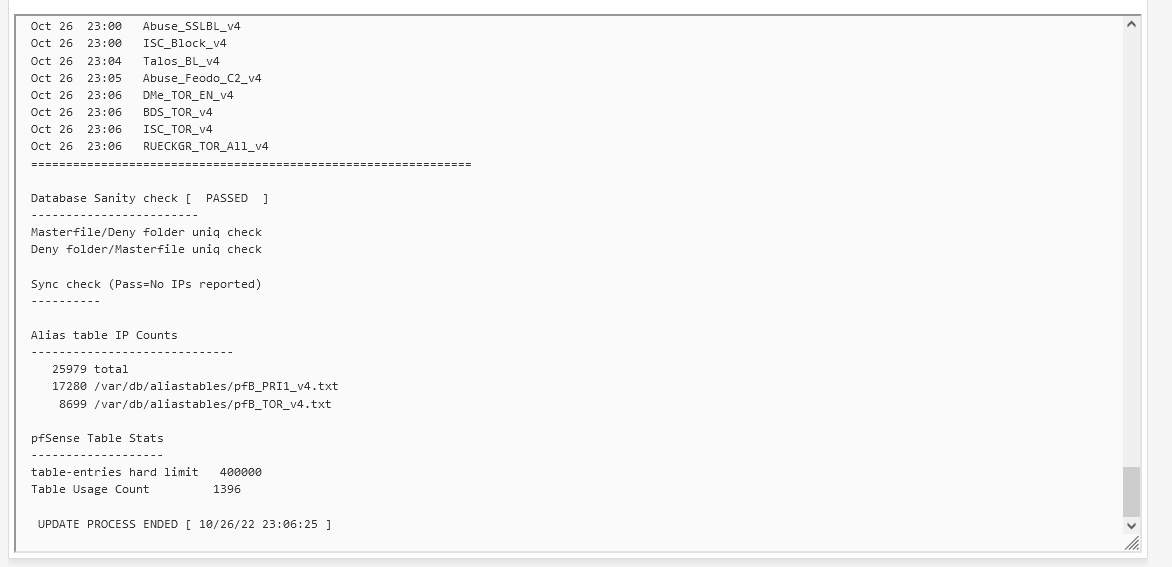
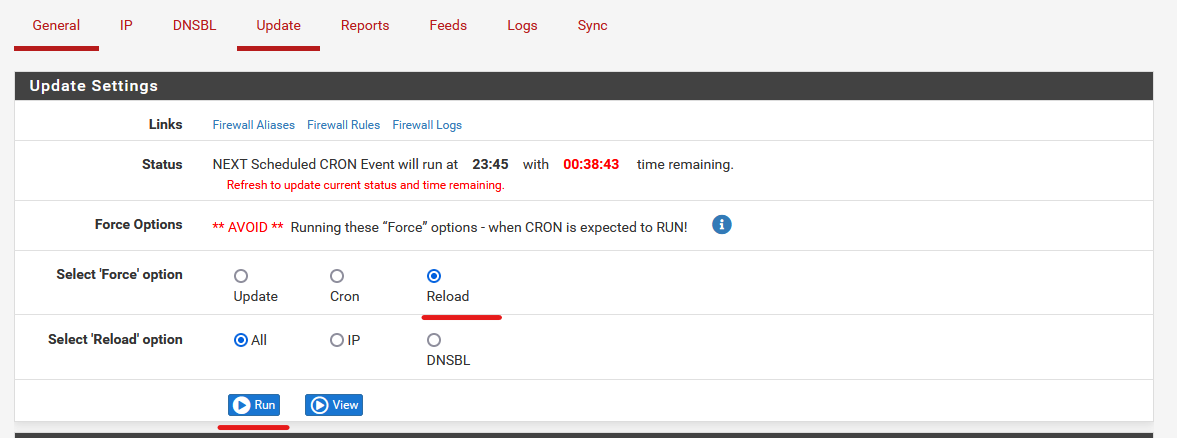
Head over to the Update Tab, and click Run. This will pull down data from the Feeds to pfBlockerNG.
In the same Update page, select the Reload option and Run again. This will allow pfBlockerNG to reload with the new feed data from the update before.
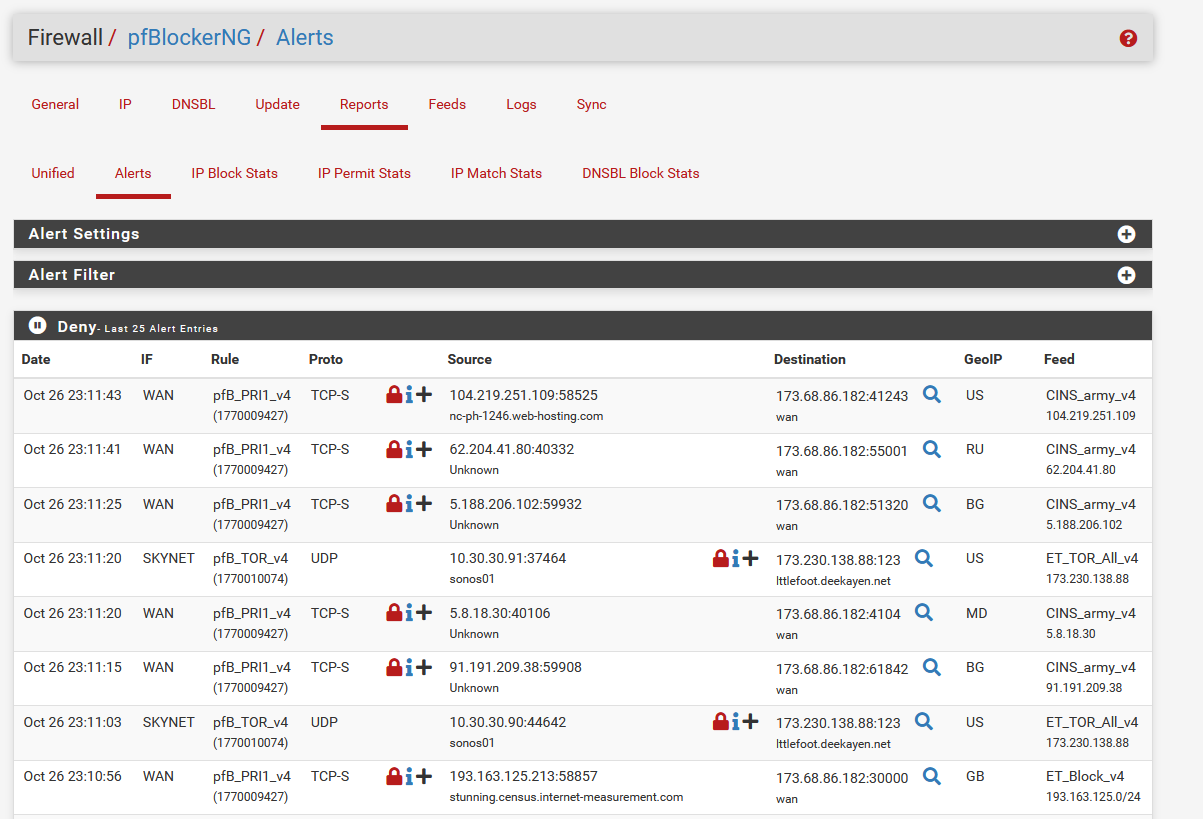
That's it! You now have added some feeds to pfBlockerNG for blocking malicious traffics. If you head over to Reports tab, you will start seeing some block traffic already. This is normal as the internet is filled with bots constantly scanning things around.

