Snapshot Tasks
A snapshot is a read-only copy of a dataset or volume at a specific point in time. It is a powerful type of data protection mechanism that allows you to capture the state of your data at a particular moment, and preserve that state for future reference or recovery.
Snapshots work by creating a point-in-time copy of the data, typically by recording the changes made to the original data since the previous snapshot was taken. This means that snapshots take up less space than a full backup, because they only store the changes made since the last snapshot.
You can even roll-back a dataset to a previous point-in-time to instantly recover from an ransomware event!
Official Documentation: https://www.truenas.com/docs/core/coretutorials/storage/snapshots/
Creating a Manual, One Time Snapshot
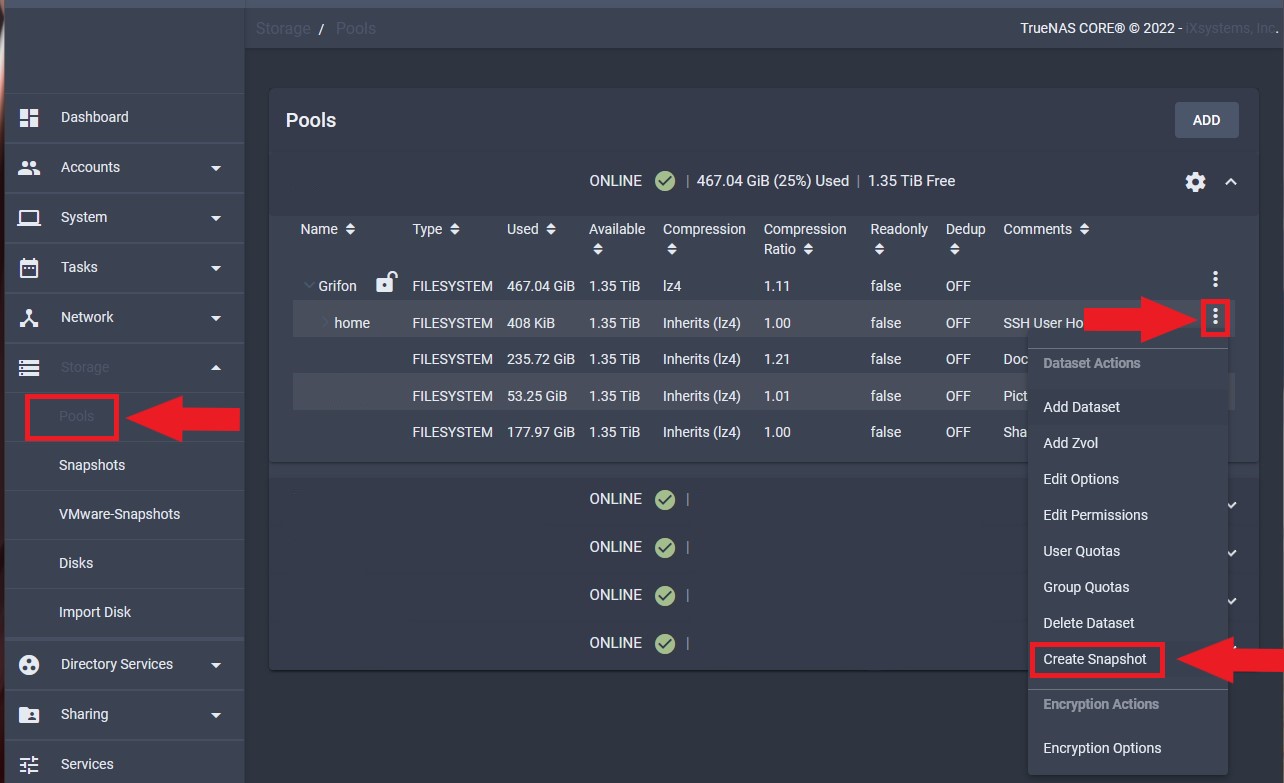
Login to the TrueNAS WebGUI.
Click on the three dots (Dataset Actions) on the dataset that you want to take a snapshot of, and select Create Snapshot.
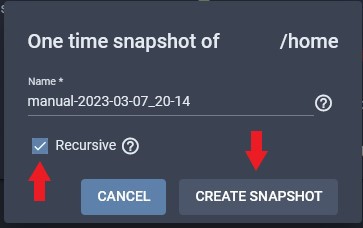
An option will pop up. Enter a custom name for the snapshot, or leave it as the prefilled name.
Check the Recursive option if you have any child datasets, and then click Create Snapshot.
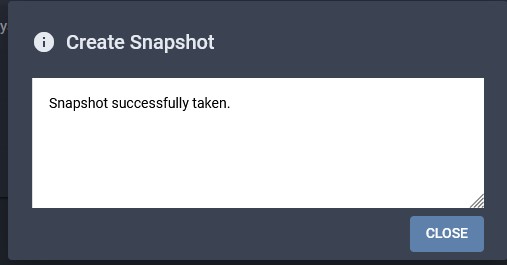
That's it! Snapshot taken.
To verify that snapshot is taken, head over to Storage -> Snapshots.
Search for your snapshot name. If snapshots are successfully taken, you will see them here.

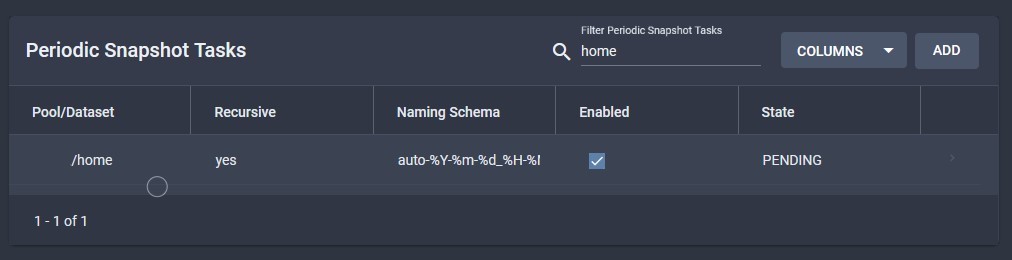
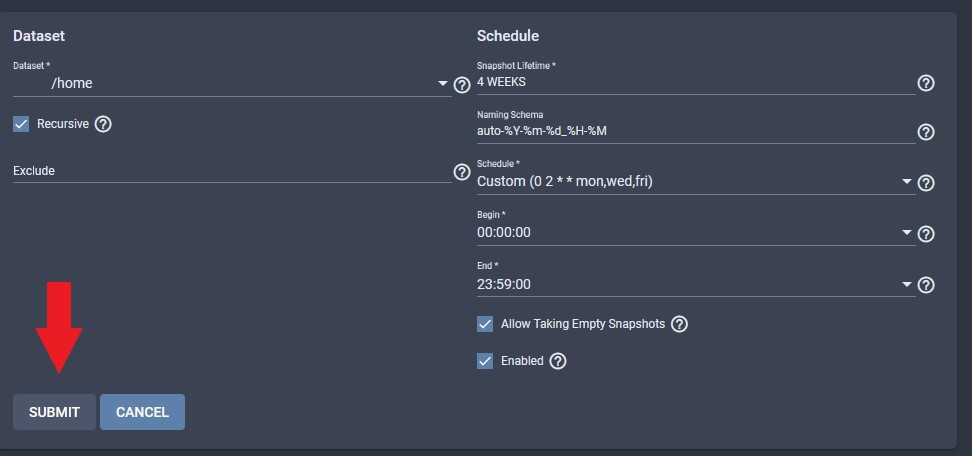
Creating a Periodic Snapshot Task
TrueNAS also supports snapshot creation on a periodic schedule.

In here, you will see configurable options for the Snapshot task.
Select the dataset that you want to take snapshots for.
For Snapshot Lifetime, this is the time that TrueNAS will keep the snapshots for. This is represent in HOURS, DAYS, WEEKS, MONTHS, or YEARS.
You can use a custom naming scheme for the snapshot names. I generally leave it on the prefilled naming scheme.
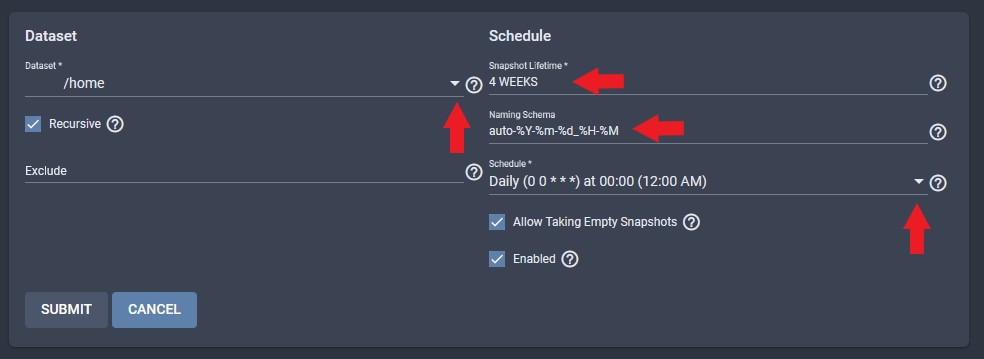
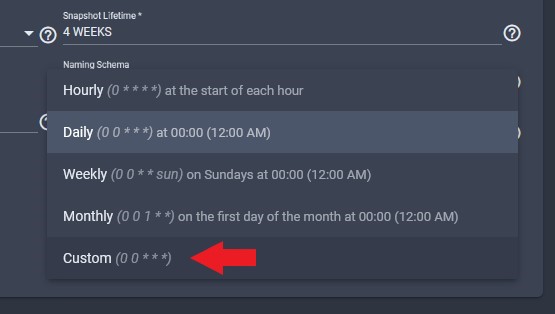
Under Schedule, click on the drop-down, and choose Custom. This will bring up the Custom Schedule options.
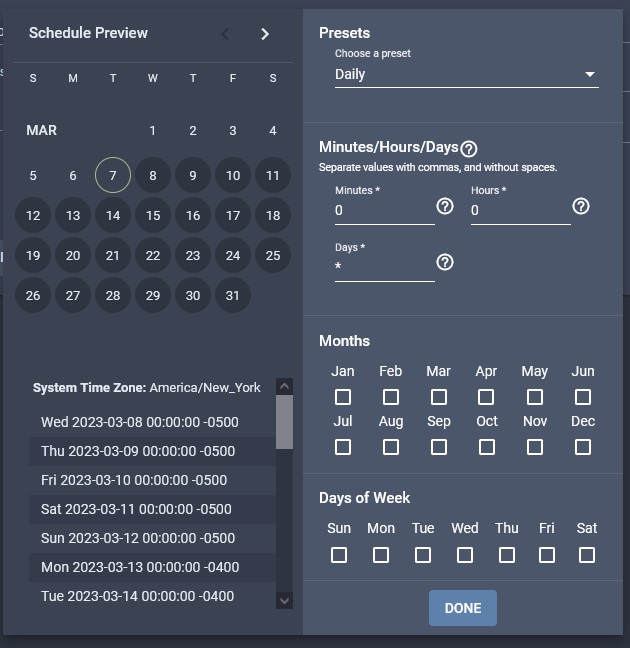
Here, you can select the options for the schedule.
In the Minute and Hours section, put in the time for when you want the Task to run. In the Days section, you can put in a number between 1-30 if you want the task to run once a month. Otherwise, leave the Days as *.
Under Months, select the month that you want to task to run. If you want the task to run at all months, leave the months unchecked.
Under Days of Week, select the days that you wan the task to run. If you want the task to run at any day of the week, leave it uncheck.
The below image shows a schedule task of running at 2:00 on Monday, Wednesday, and Friday.
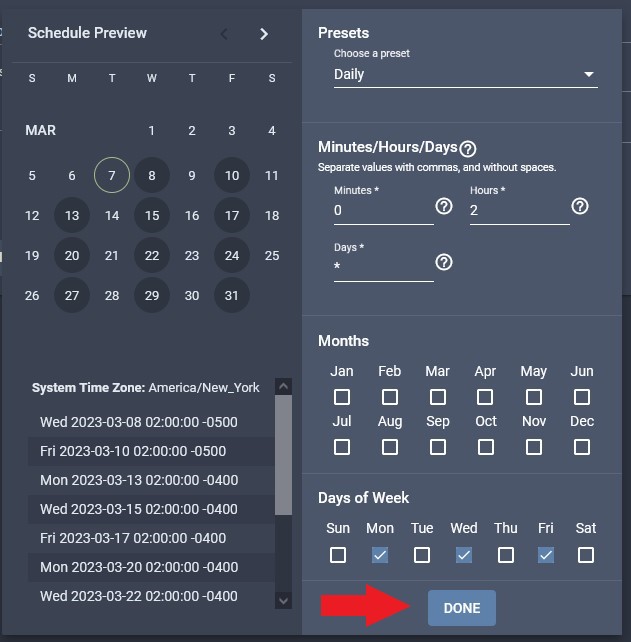
Once schedule is set, click Submit to save the task.
That's it! You should now see the Periodic Snapshot Tasks created.