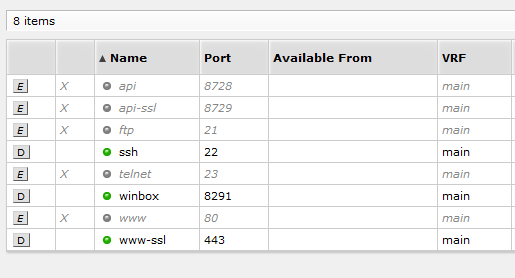
Enable HTTPS for WebGUI
To use HTTPS for the RouterOS WebGUI, first we would need to upload a certificate to the RouterOS device.
Generate a self-sign cert from another place, such as pfSense, Creating Self-Signed Certificate Authority and Certificates, and export it as a .crt and .key file.
Login to the RouterOS webGUI (you may need to login via HTTP for this), then go to Files -> Browse.
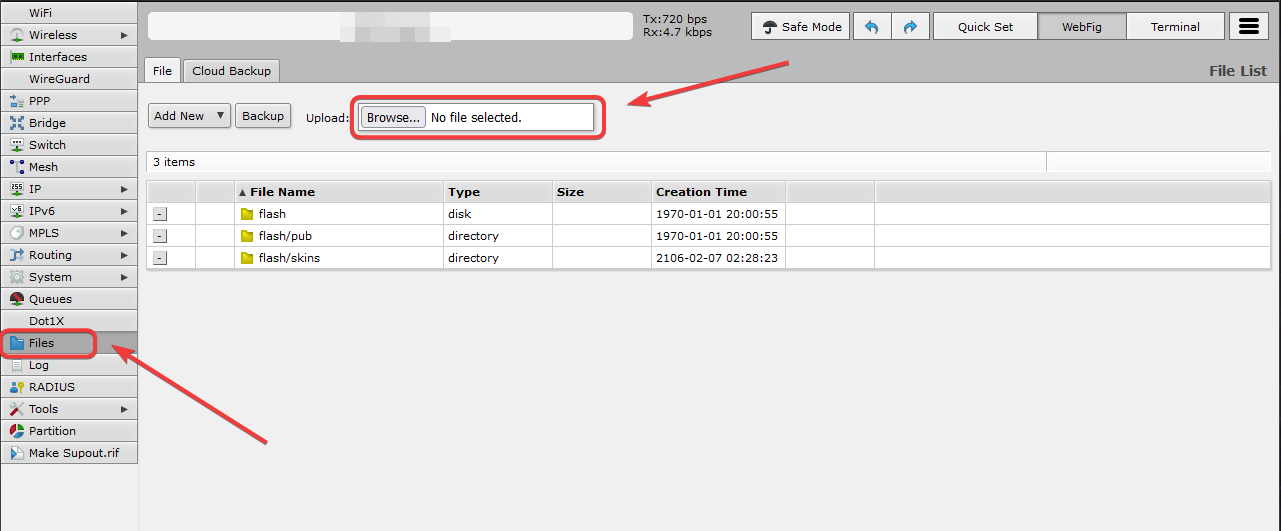
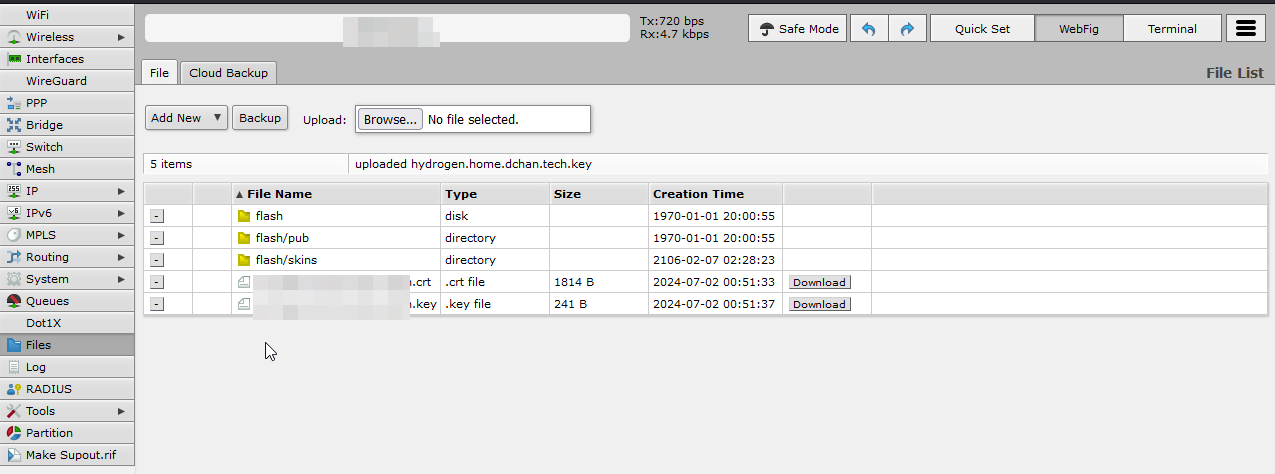
Upload the .crt and .key file. If sucessful, you should see the file names appear.
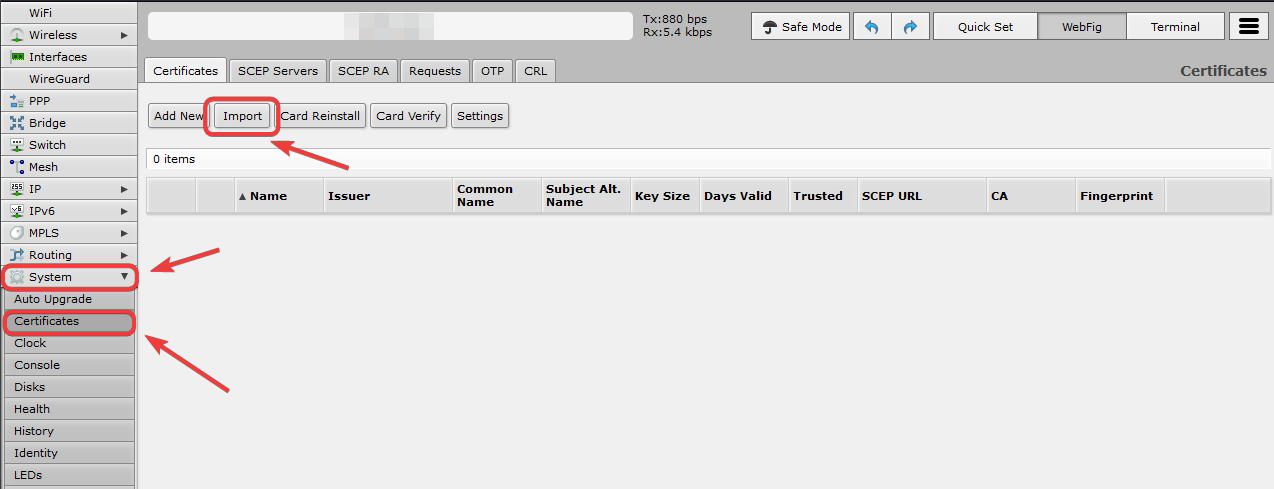
Go to Systems -> Certificate, and click Import.
Click on the triangle next to the Name field, and give the cert a name.
Under File Name dropdown, select the cert file that you have imported previously.
Click Import when done.
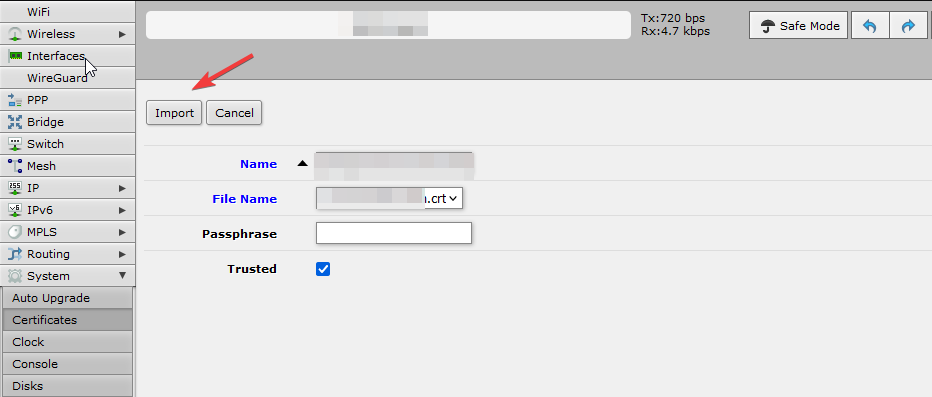
You will see that the cert has been imported. Repeat the above steps to import the key as well.
If both cert and key has been sucessfully imported, you will see the letter KT in the first column, indicating that both a key and a cert is impoted to the system.

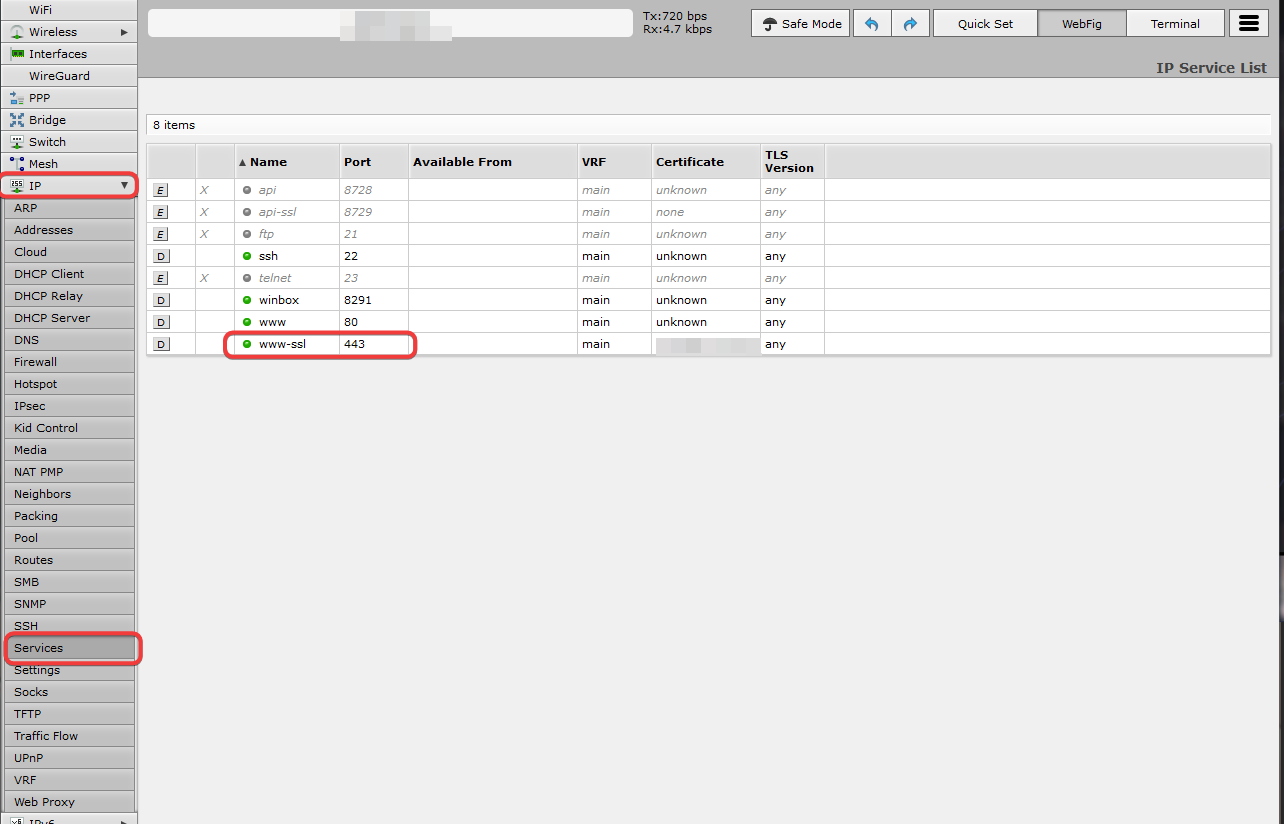
Go to IP -> Services. Click on www-ssl.
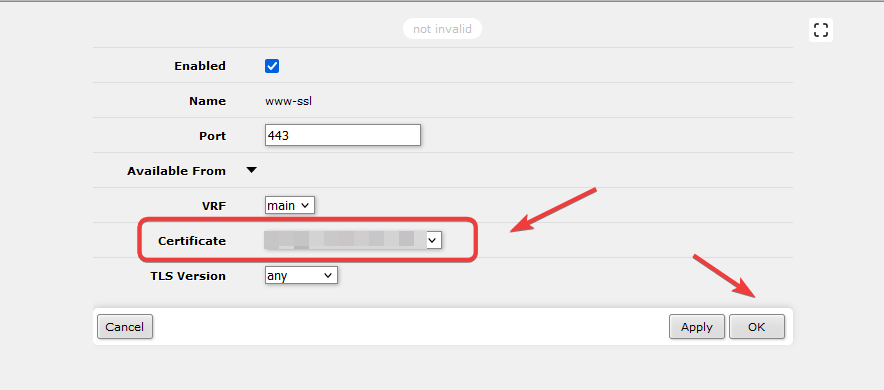
Check the box to Enable the service, and select the SSL cert. Click ok when done.
Now you can access the device over HTTPS.
While we are at the IP -> Services page, it is a good idea to disable any unused or unsecure services running on the device, such as FTP and Telnet.
