
Set your Window Computer’s DNS to Pi-Hole
Since everyone will have different network setup, it is best to do some research on the router you have for your network.
If you do not know the settings for your router, you can alternatively set the DNS setting locally on your computer. You will have set the DNS setting on every individual devices to Pi-Hole if you choose to do it this way.
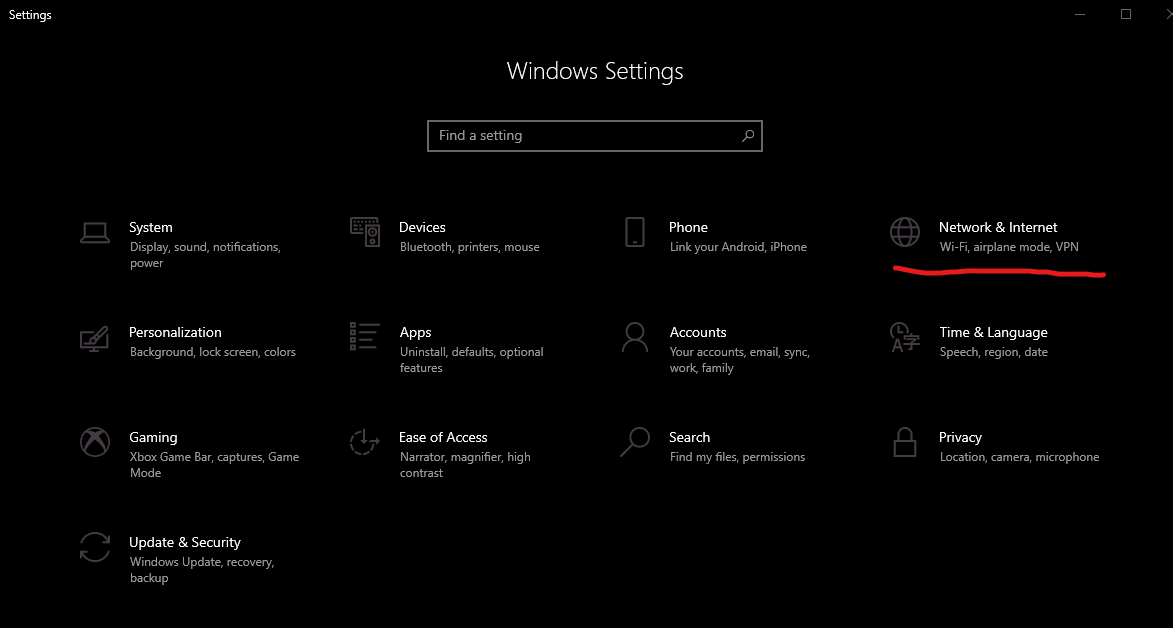
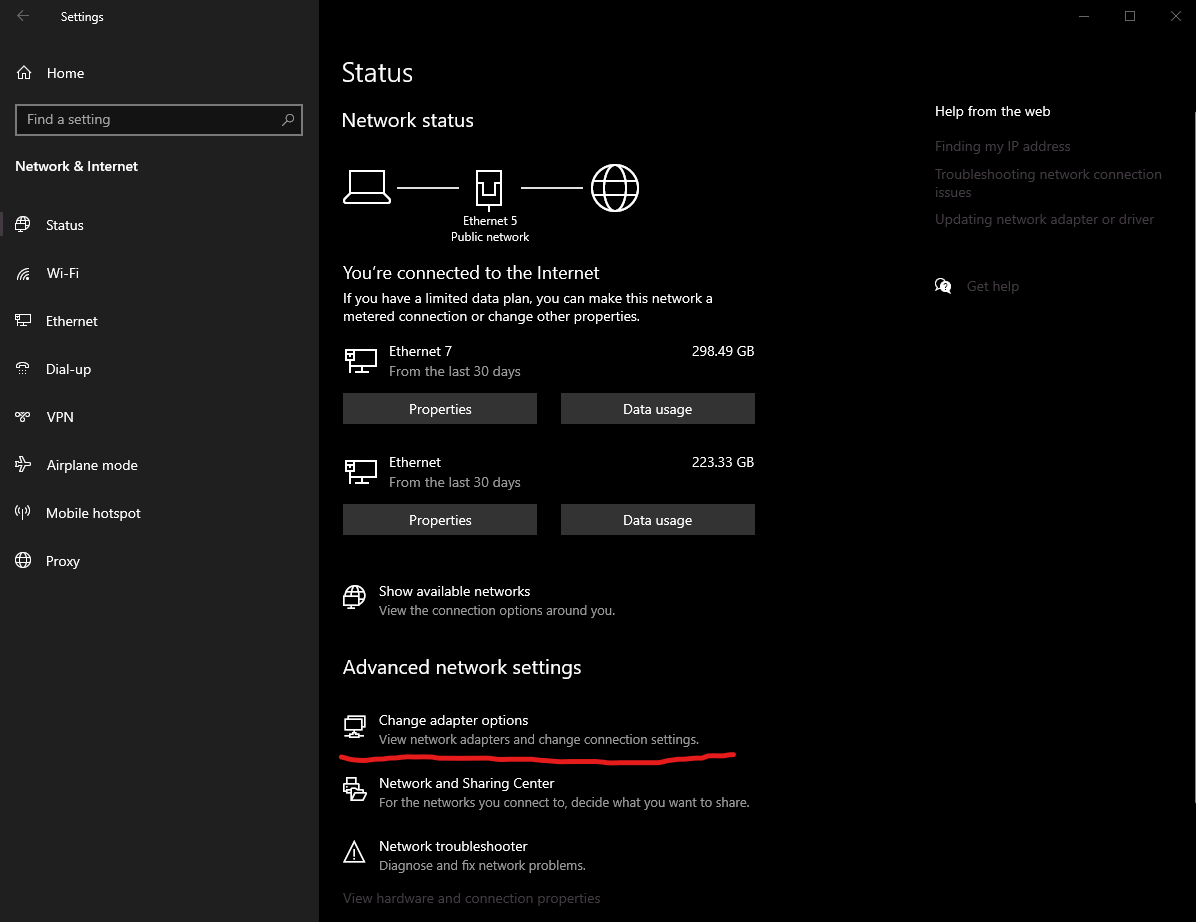
For Windows computer, the setting can be found in the Start Menu -> Settings -> Network & Internet -> Change Adapter Options
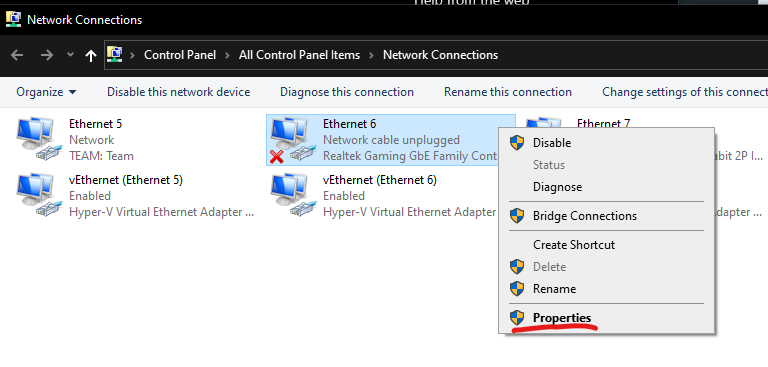
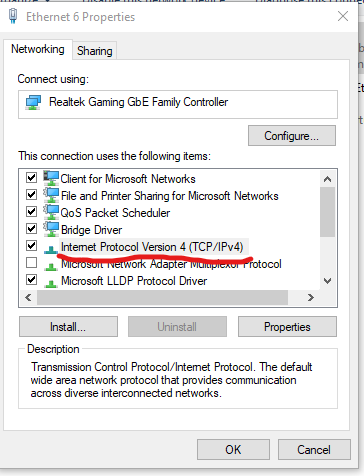
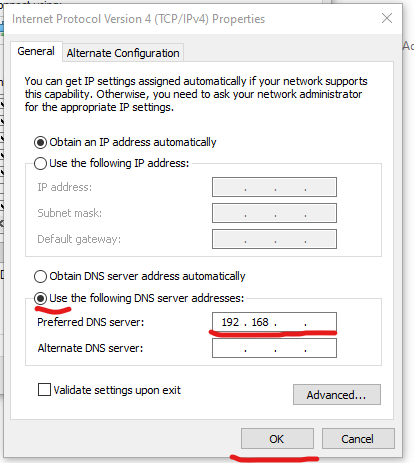
Right-Click on the Ethernet or Wi-Fi Adapter for your computer, and choose Properties. Select Internet Protocol Version 4. Select Use the following DNS Address and enter the Pi-Hole IP Address. Click Ok to save the changes.
Now your computer will make DNS requests to the Pi-Hole, and Pi-Hole will block the Ads before it even reaches your computer.