
Adding Your Custom Domain to SimpleLogin
Adding a Custom Domain
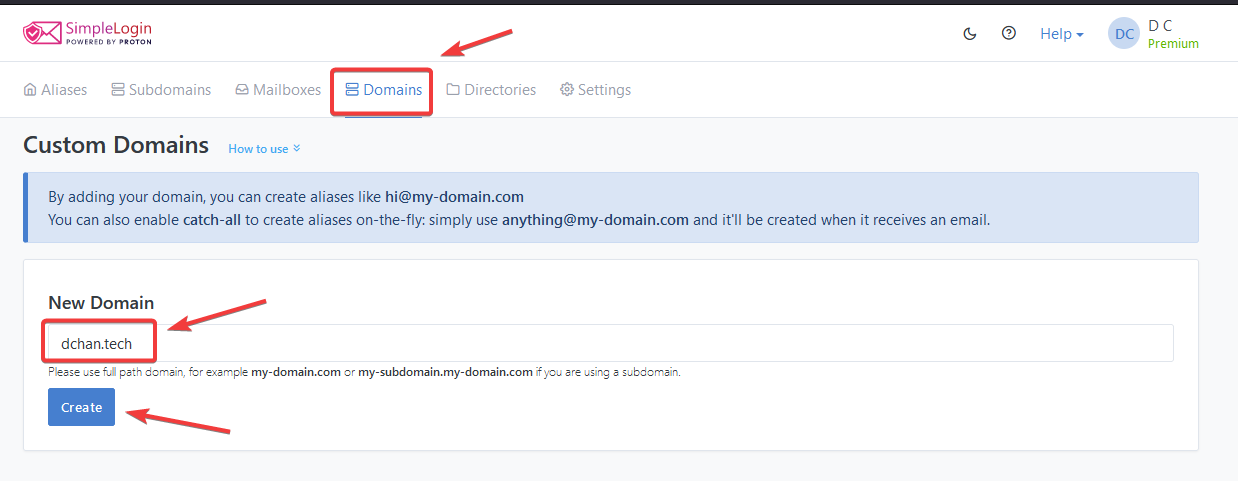
Sign in to your SimpleLogin account using your credentials.
Once you're logged in, click on the Domains tab, enter your custom domain, and click Create.
Verify Ownership of Your Domain
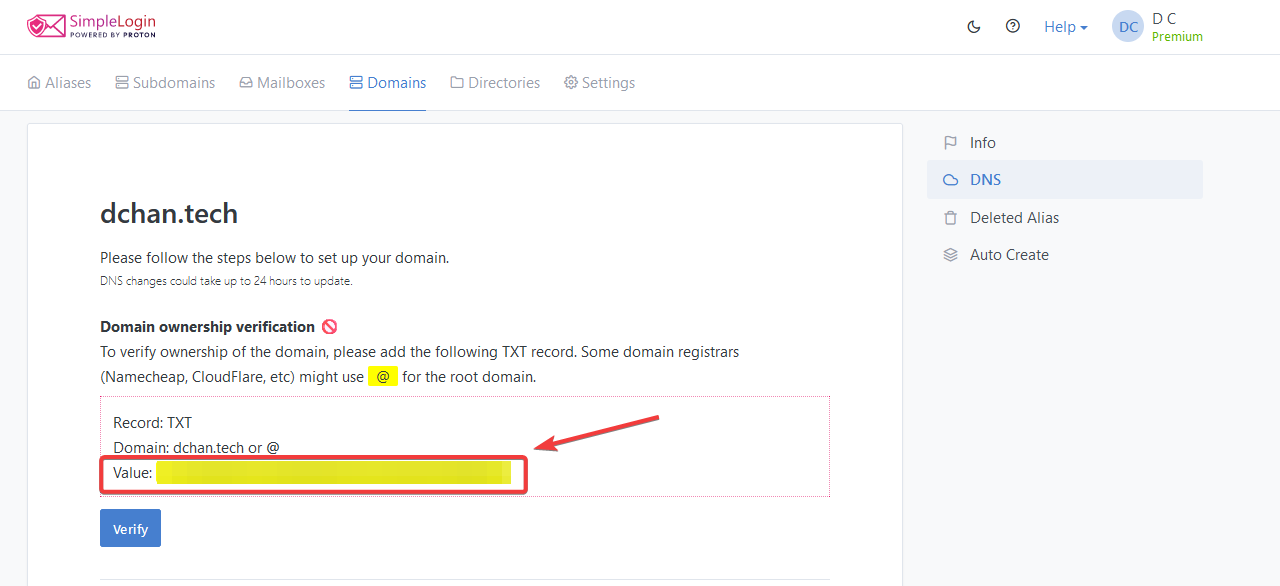
Once the domain is added, SimpleLogin will ask you to verify your domain's ownership.
Verification is done by creating a TXT record in your domain's DNS record.
Copy the value of the TXT record, then head over to your domain's DNS settings.
For me, my domain's DNS settings are managed through Cloudflare. This guide will show the Cloudflare settings, but the idea will be the same for any other registrars.
Create your TXT record for the domain, with the value you copied earlier from SimpleLogin.
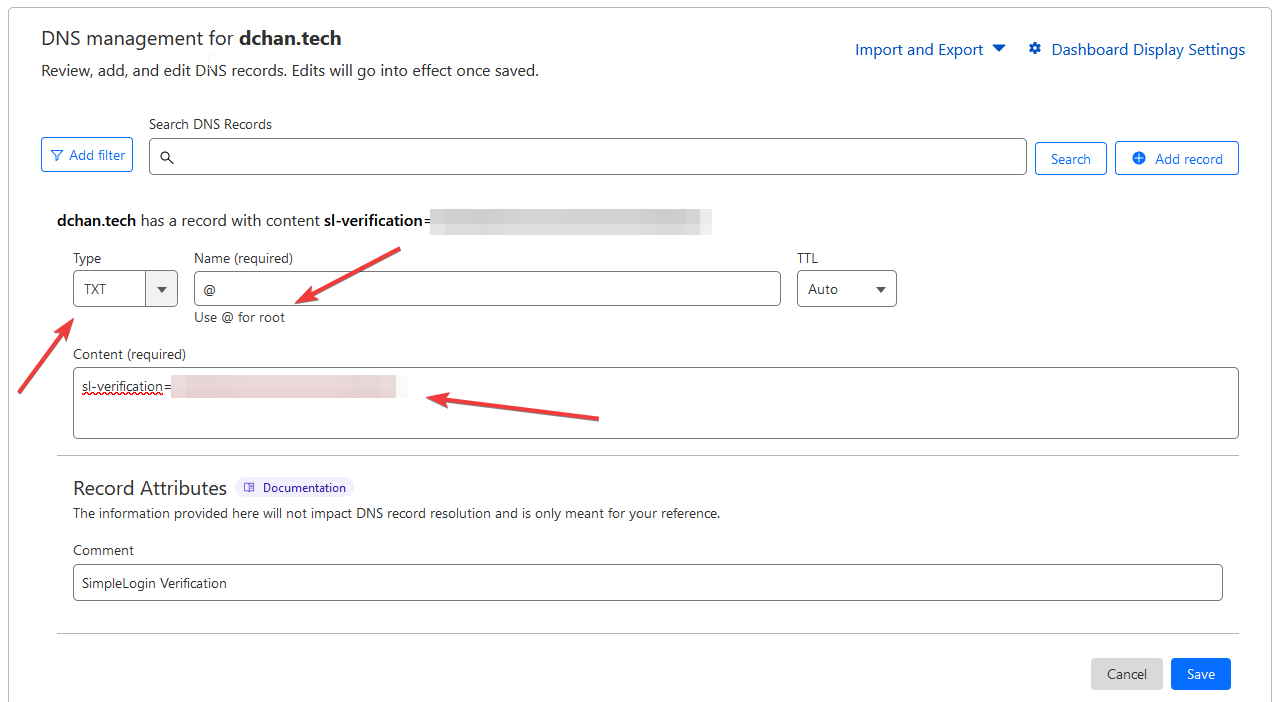
Once the TXT record is added, wait a bit. DNS changes may take some time to propagate across the internet.
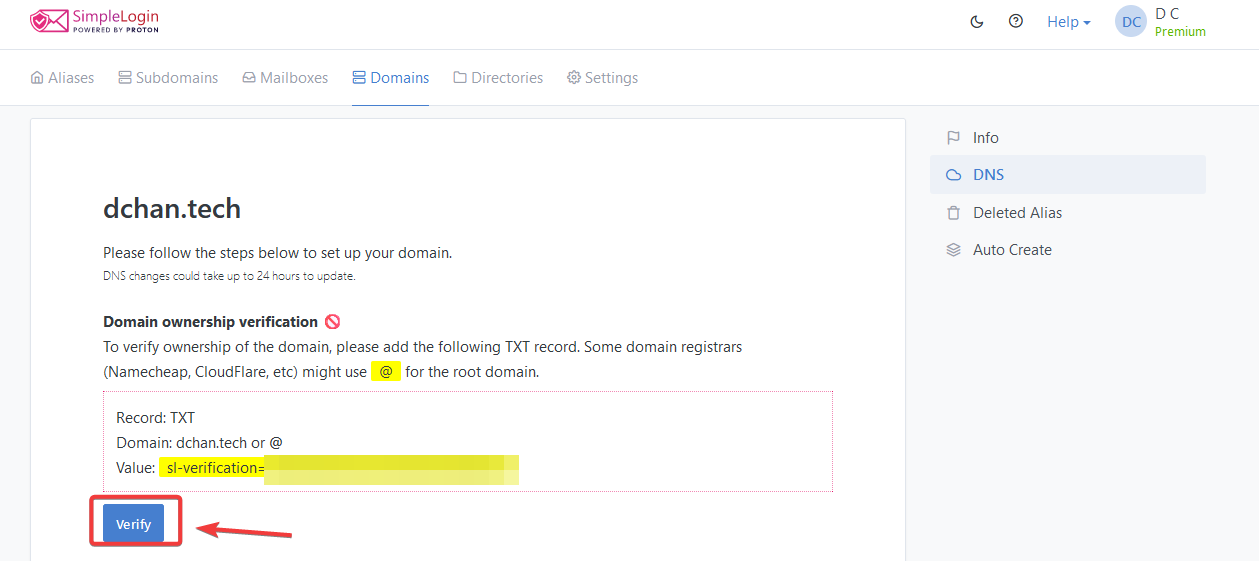
After some time passes, you can click on Verify back in SimpleLogin, and your domain should now be verified.
Add MX Records
In order to use SimpleLogin as your email forwarding service provider for this domain, you'll need to update your domain's MX (Mail Exchange) records.
SimpleLogin's step by step instructions are pretty straight forward and easy to follow.
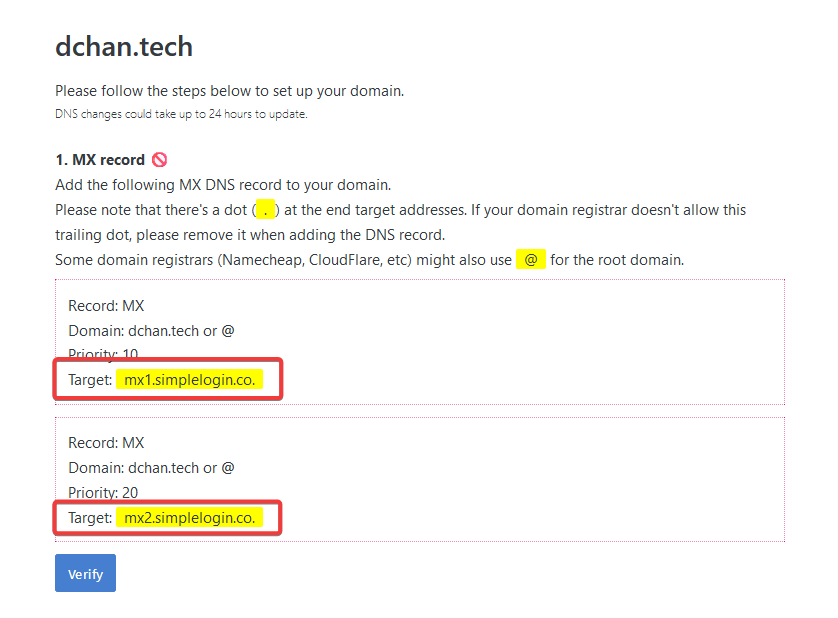
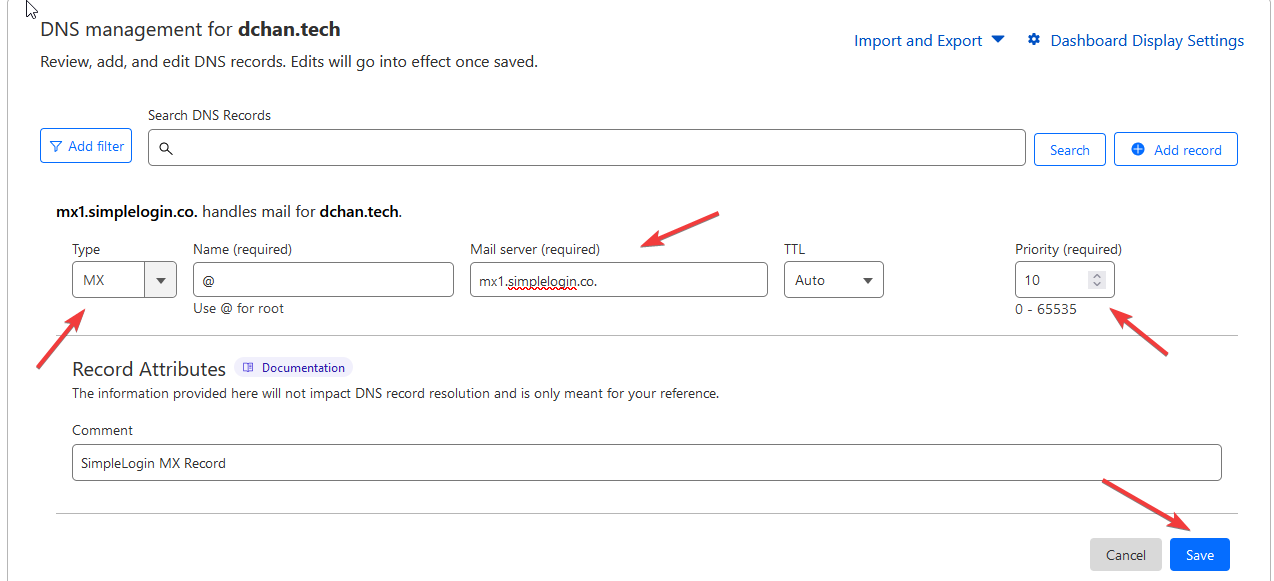
Add the MX records.
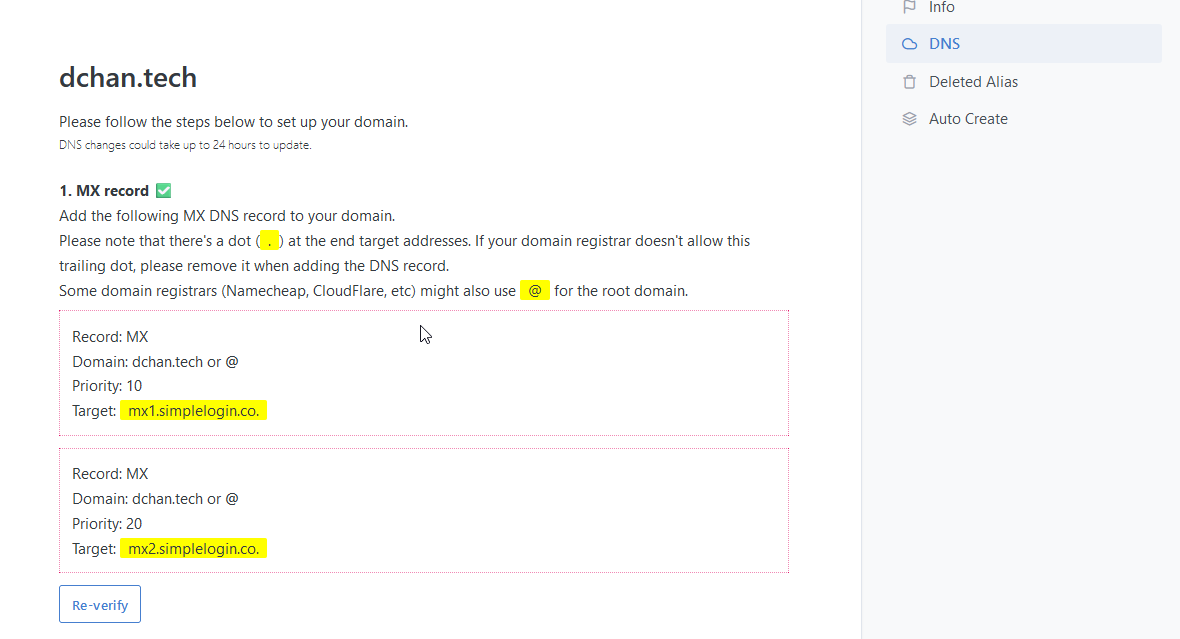
Once added, click Verify.
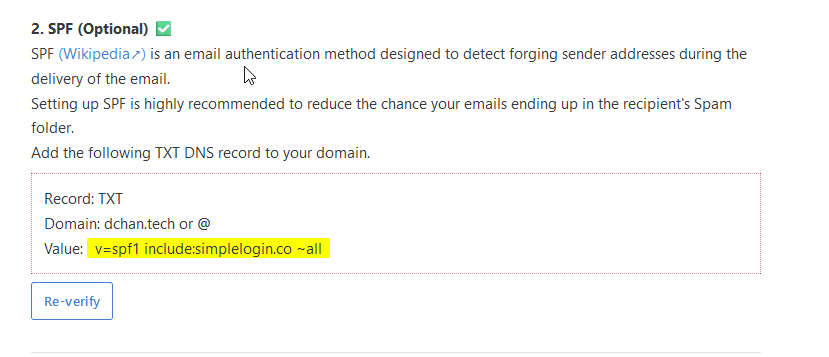
Add SPF Records
SPF, which stands for "Sender Policy Framework," is a type of DNS (Domain Name System) record that helps protect email senders and recipients from email spoofing and phishing attacks.
SPF records protect against email spoofing and phishing by verifying the legitimacy of email senders. SPF records are a crucial component of email authentication and provide a way for email servers to verify that an incoming email from a specific domain is sent from an authorized source.
Copy the SPF value from SimpleLogin.
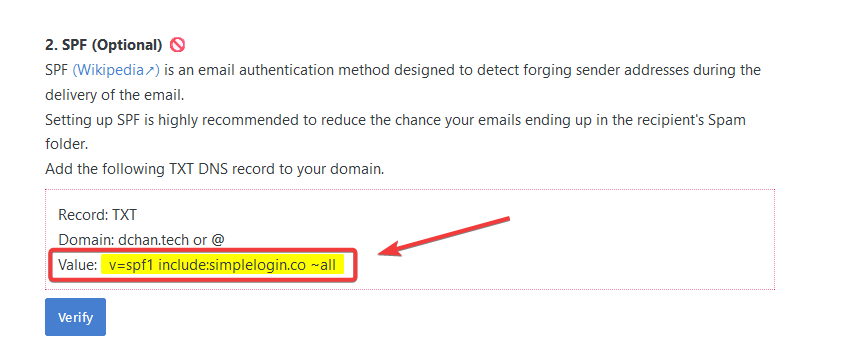 Add the TXT record in your domain's DNS setting.
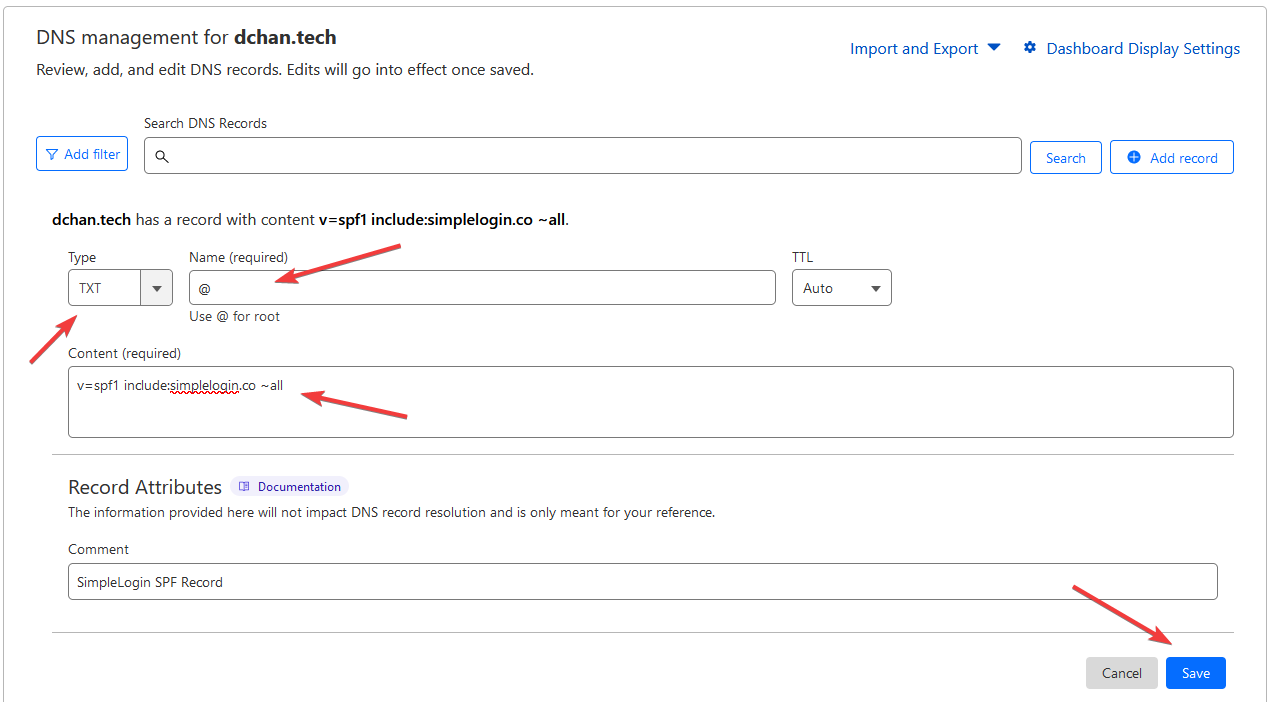
Click Verify.
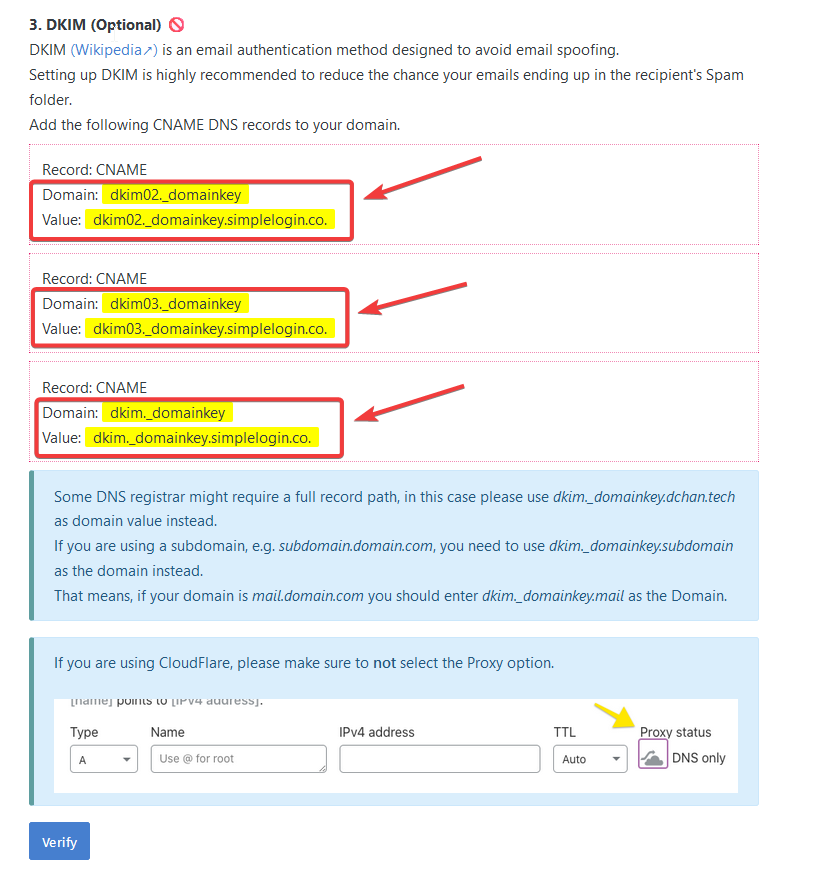
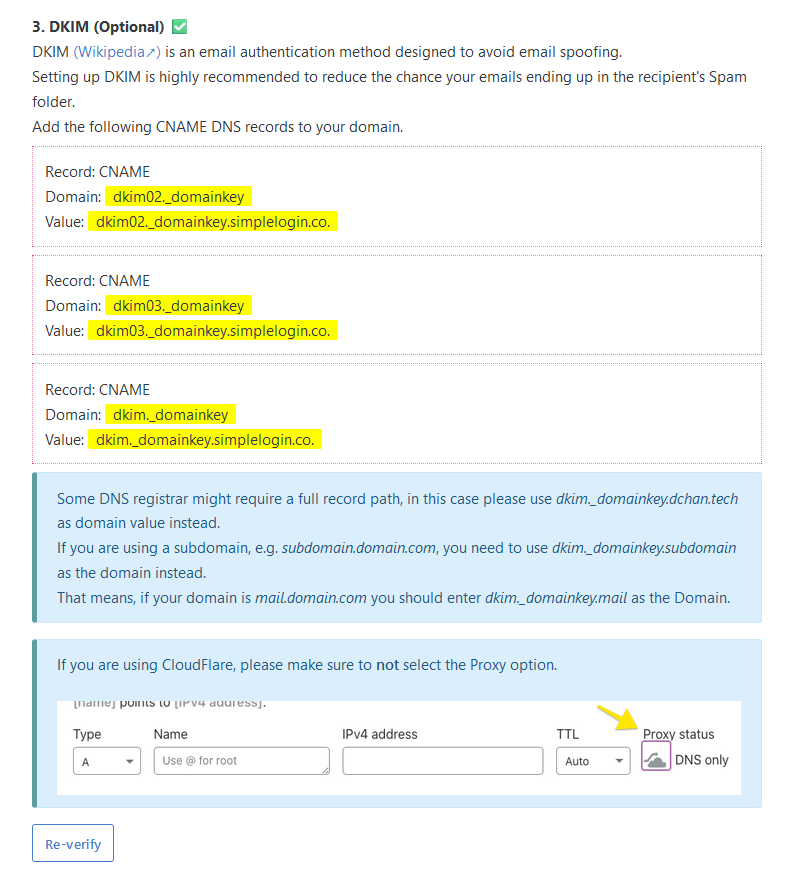
Add DKIM Records
DKIM, which stands for "DomainKeys Identified Mail," is another crucial email authentication mechanism that helps protect email senders and recipients from email fraud, spoofing, and phishing attacks.
DKIM records protect against email fraud, forgery, and phishing by providing a mechanism to verify the authenticity of emails and their senders. DKIM works by digitally signing outgoing emails from a domain with a private key, and the recipient's email server can verify this signature using a public key published in the sending domain's DNS records.
Copy the DKIM value from SimpleLogin.
 Add the CNAME record in your domain's DNS setting.
If you are using Cloudflare to manage your domain's DNS setting, make sure the Proxy Status is toggled off.
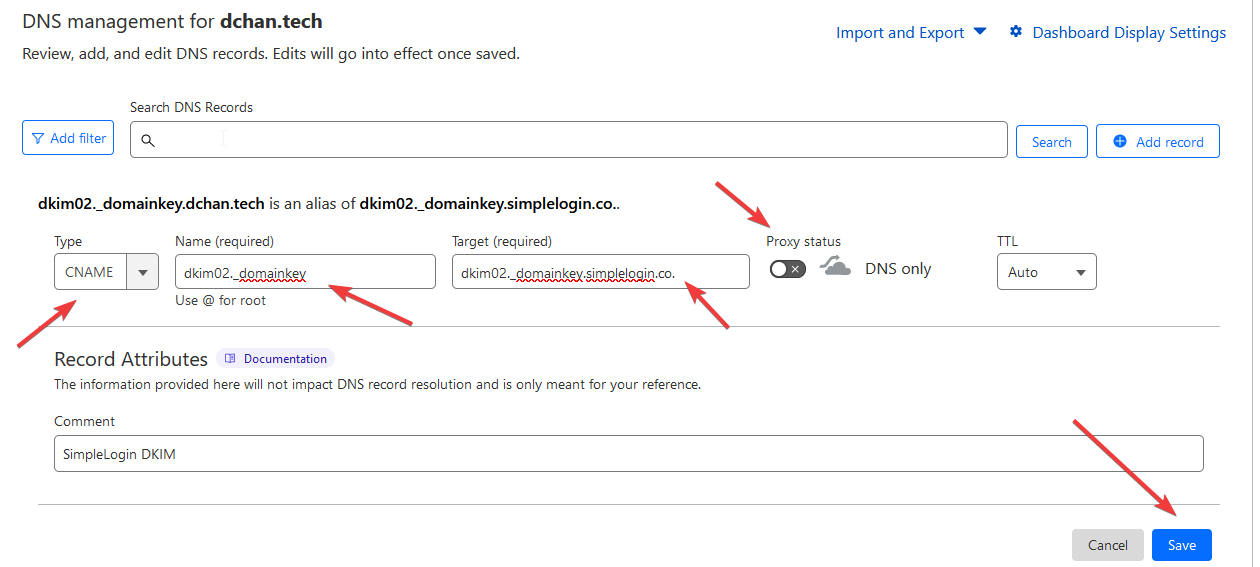 Click Verify.
Add DMARC Records
DMARC, which stands for "Domain-based Message Authentication, Reporting, and Conformance," is an email authentication protocol designed to enhance email security and protect against phishing and email spoofing attacks.
DMARC protect against email spoofing and phishing by defining how email receivers should handle messages that fail authentication checks and by providing monitoring and reporting mechanisms to domain owners. DMARC records are published in a domain's DNS settings and provide instructions to email receivers on how to handle messages that fail authentication checks.
Copy the DMARC value from SimpleLogin.
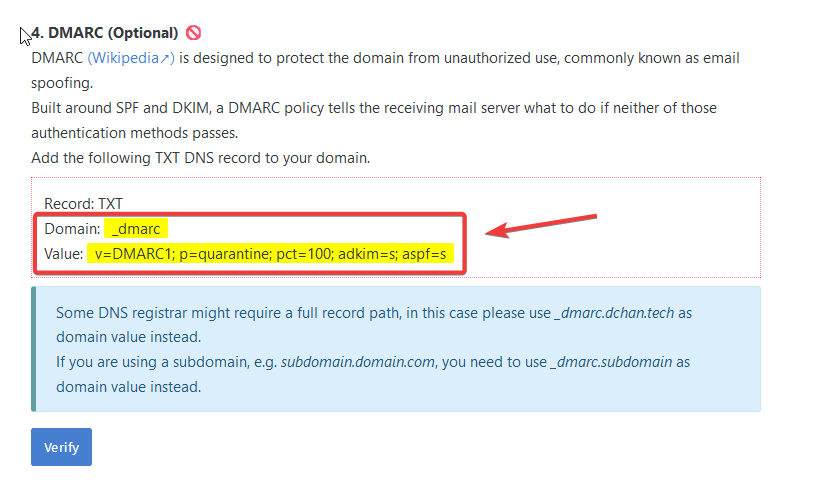 Add the TXT record in your domain's DNS setting.
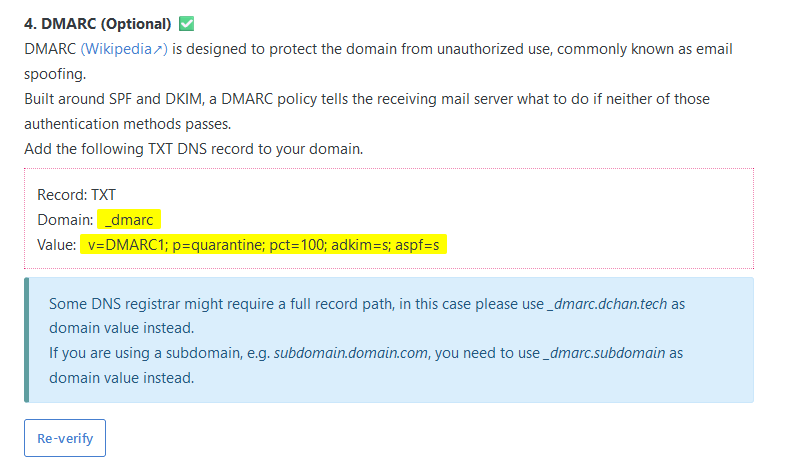
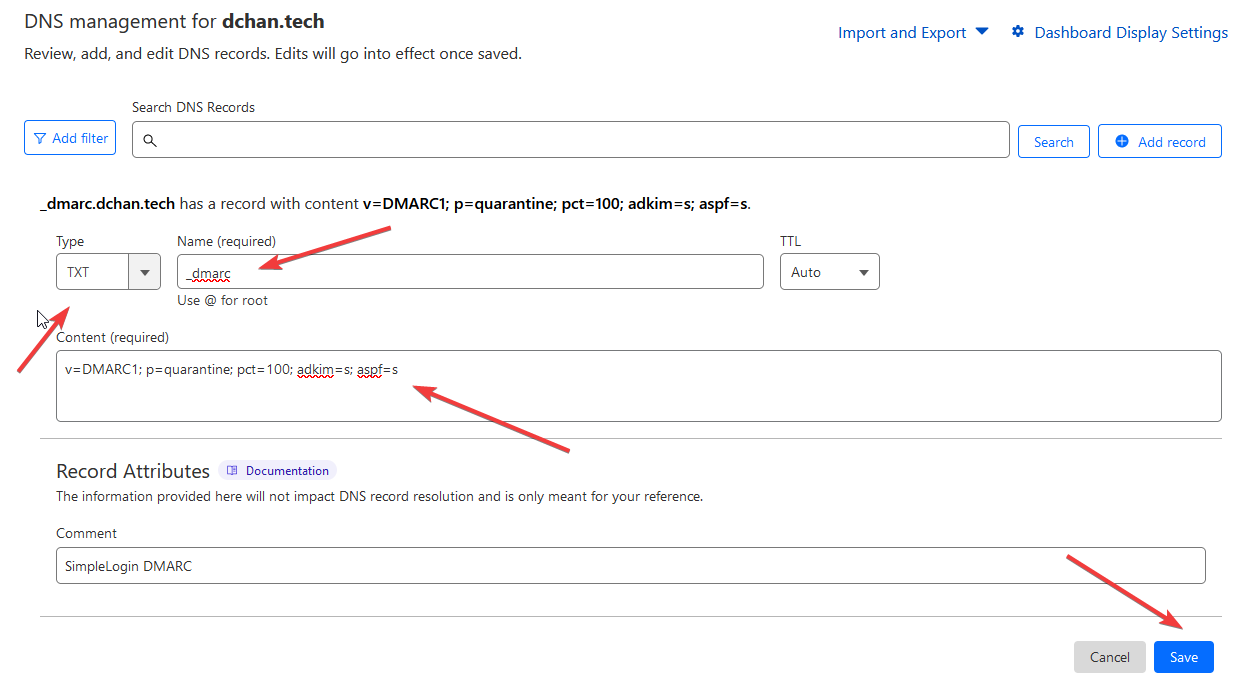 Click Verify.
That's it!
You have now successfully added your custom domain to SimpleLogin, and setup the MX, SPF, DKIM, and DMARC records.