Blocklist Mirror Bouncer - Utilize CrowdSec for Firewalls
In the latest version of CrowdSec, there is now an Blocklist Mirror Bouncer. This bouncer will take CrowdSec Security Engine's active decision and put it into an block list format, and share it via HTTP.
Similar to public IP/DNS Blocklist like the ones Pi-Hole or uBlock Origin uses, you can import the blocklist created by the Blocklist Mirror Bouncer into supported firewall and get additional protection.
For example, you can utilize the pfBlocker package in pfSense to take in the CrowdSec Blocklist, and block any traffic that matches the list.
Install the Blocklist Mirror Bouncer
You can find out more about the Blocklist Mirror Bouncer at the official documentation site https://doc.crowdsec.net/docs/bouncers/blocklist-mirror.
To start, run the following command to install the Blacklist Mirror Bouncer on your Debian system.
sudo apt install crowdsec-blocklist-mirror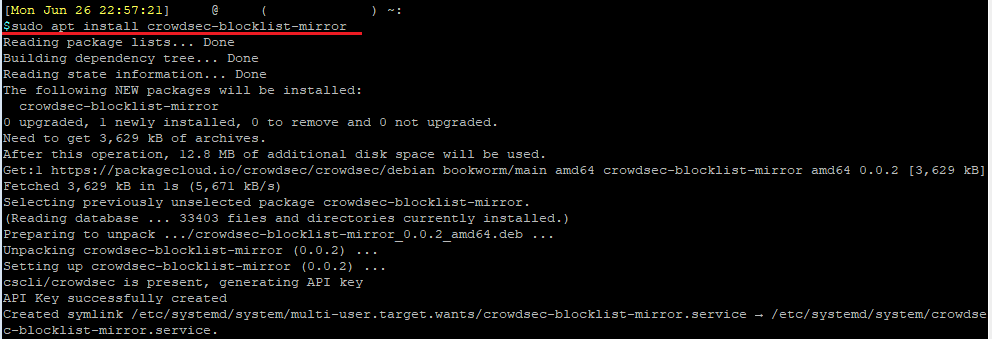
You can verify that the bouncer has been installed correctly by running the following:
sudo cscli bouncers listThis command lists out all the currently installed bouncers on the system.

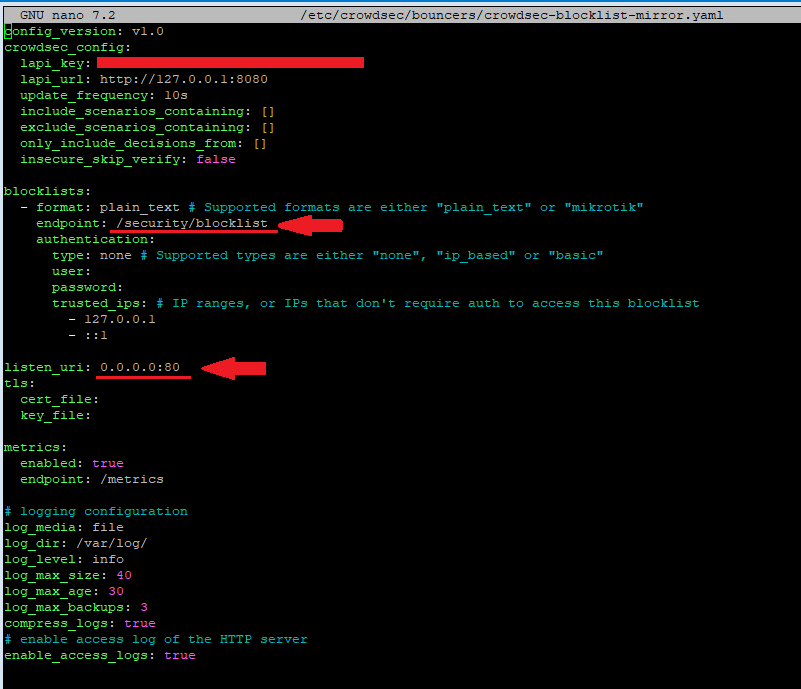
Next, edit the configuration file (using nano or other text editor) at /etc/crowdsec/bouncers/crowdsec-blocklist-mirror.yaml to change the HTTP port for the blocklist:
sudo nano /etc/crowdsec/bouncers/crowdsec-blocklist-mirror.yamlUnder the endpoint: section, you can leave it at the default /security/blocklist option. This setting is telling the HTTP server which sub-directory that the blocklist should be served at.
In the listen_uri:, change this to 0.0.0.0:80 to allow the HTTP server to listen on port 80 from any interfaces.
Save, then restart the blocklist mirror bouncer.
sudo systemctl restart crowdsec-blocklist-mirrorYou can check that the service is running with the following:
sudo systemctl status crowdsec-blocklist-mirror
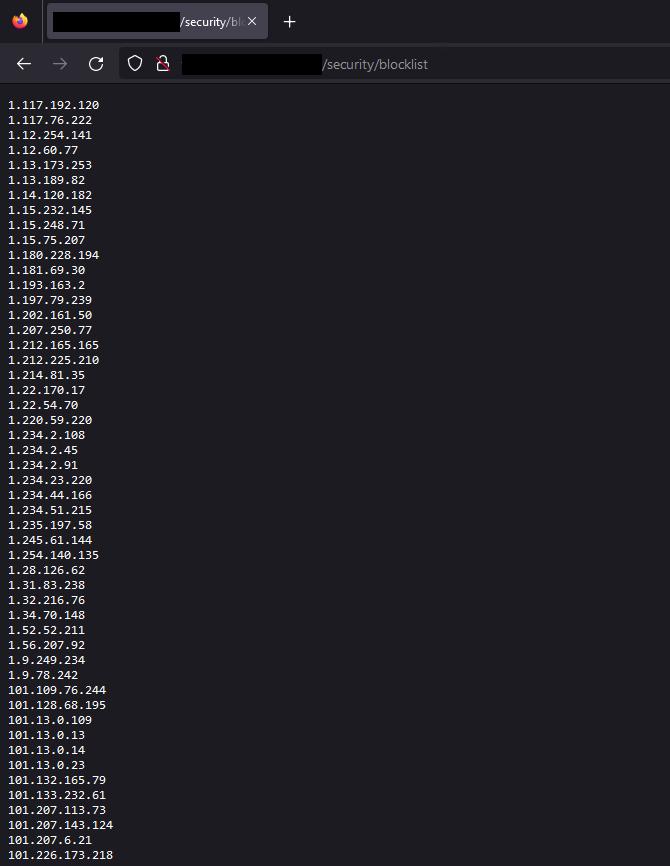
If you do not see any IPs in this list, reboot your Debian system and try again afterwards.
Adding the Blocklist Mirror to pfBlockerNG on pfSense
pfBlockerNG is an awesome package in pfSense that can do malicious IP blocking using IP block lists. You can learn more about it from my guide at pfBlockerNG.
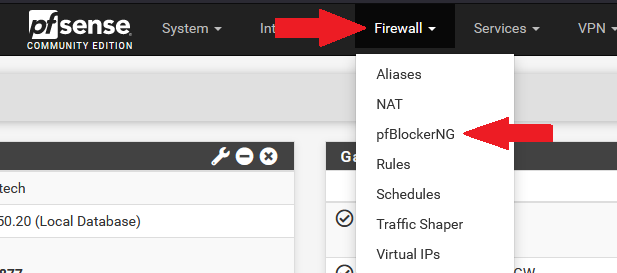
Login to your pfSense system, and navigate to the pfBlockerNG settings.
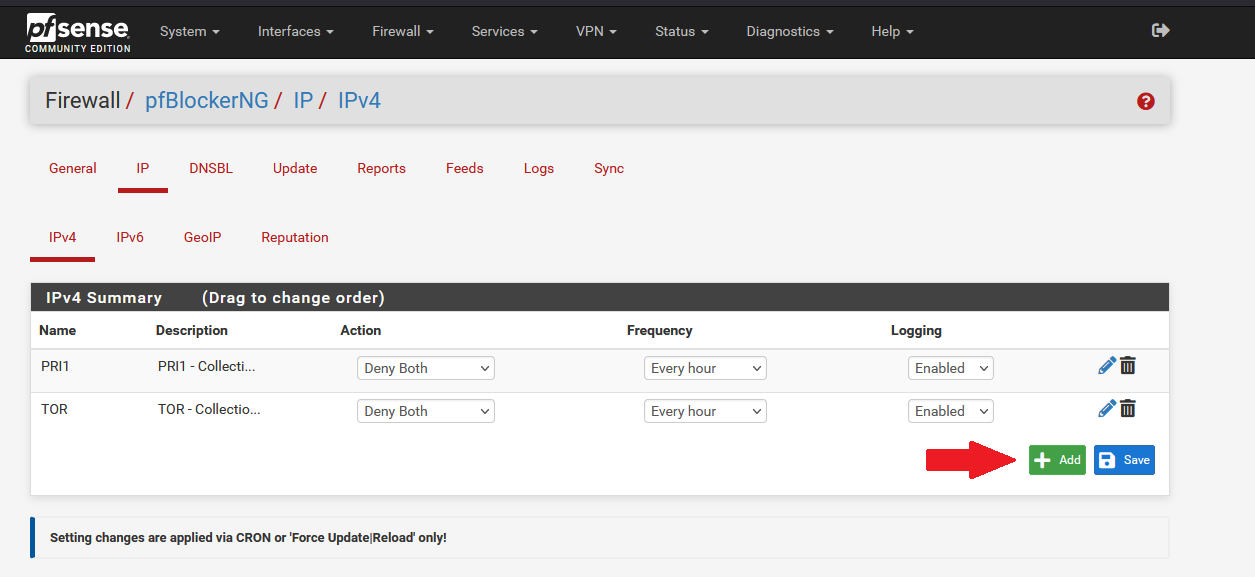
Go to IP -> IPv4, and click on Add.
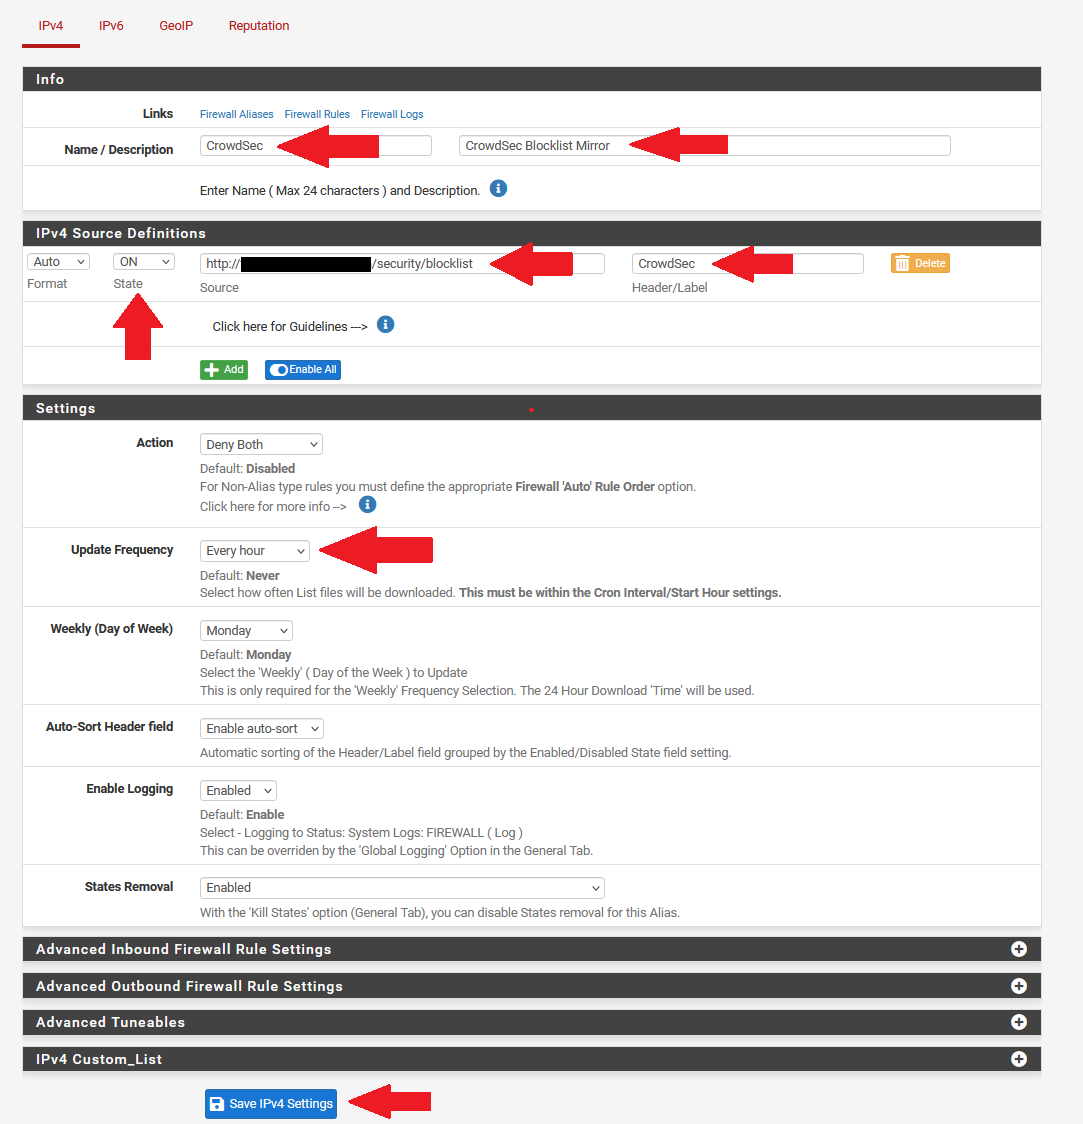
Give the new block list a name,
Under the IPv4 Source Definition, change the State to ON to activate the block list.
In the Source field, enter your CrowSec server's block list address, such as http://your_server_IP_or_FQDN/security/blocklist, Give this source a label name.
Set the Update Frequency to something you are comfortable with. This is how often pfBlockerNG will query the CrowdSec server for blocklist updates. Every hour is a good frequency to use.
You can leave the other settings on default.
Save when finished.
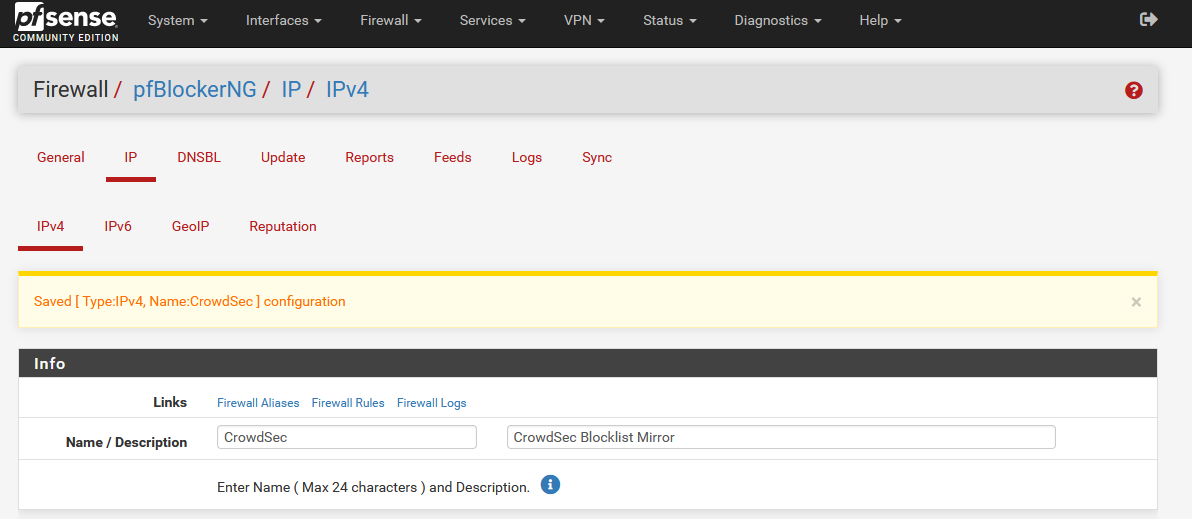
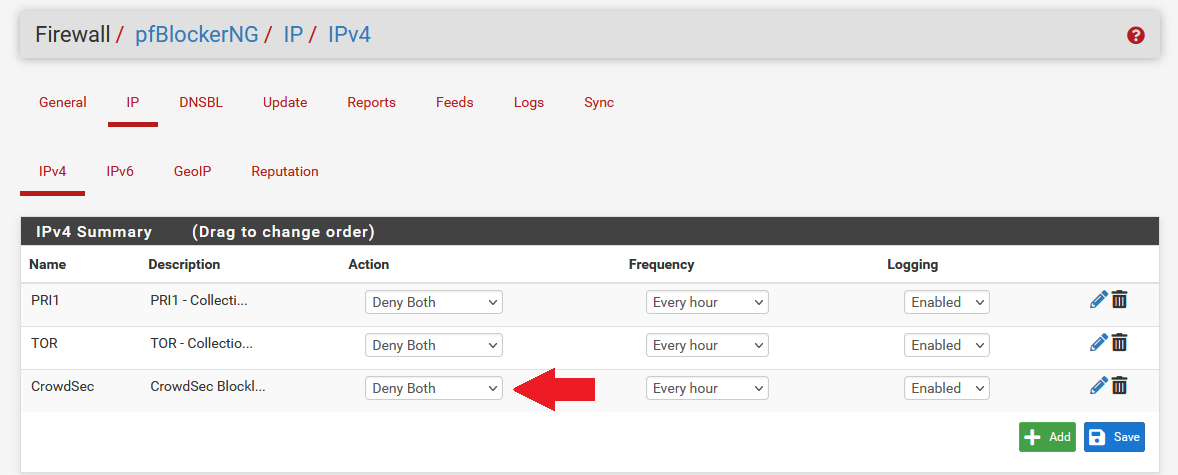
Click on the IPv4 tab again, and you will see your new block list added. By default, no action will be taken for this block list.
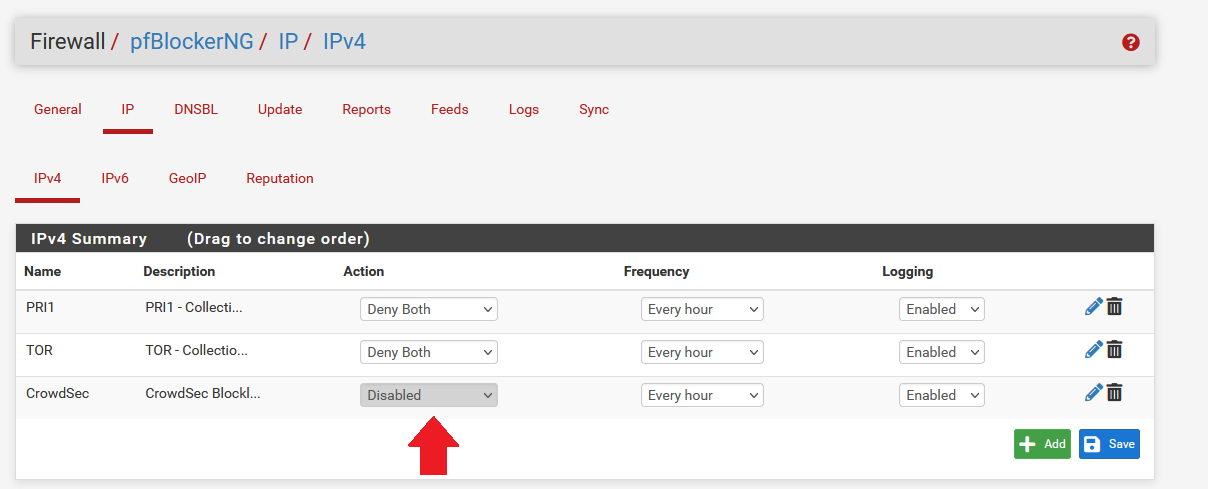
Change the Action to Deny Both to block any matched traffic coming in or out.
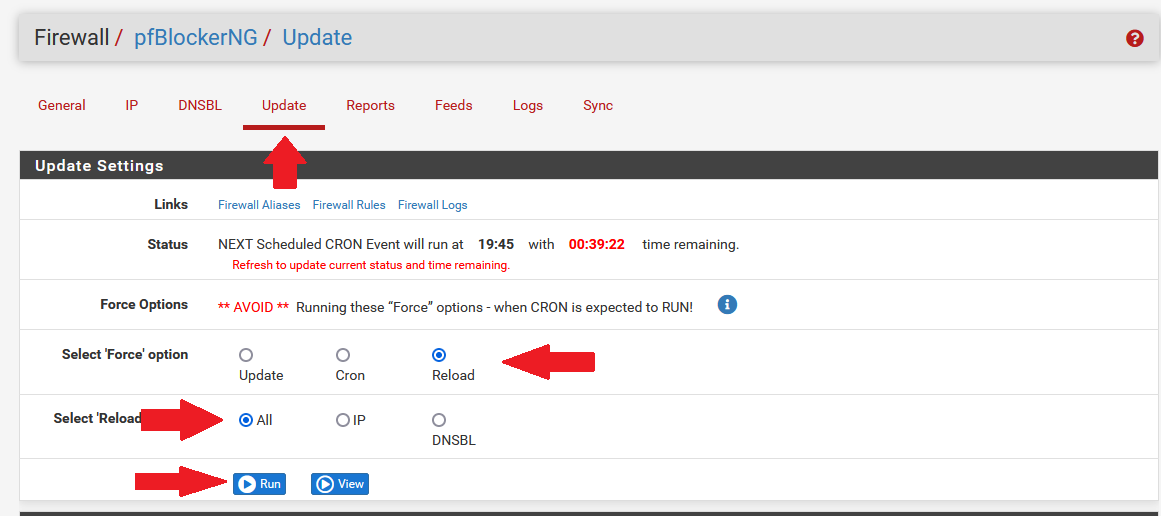
Go to the Update tab. Select Reload, All, and click Run. This will allow pfBlockerNG to pull down the block list data.
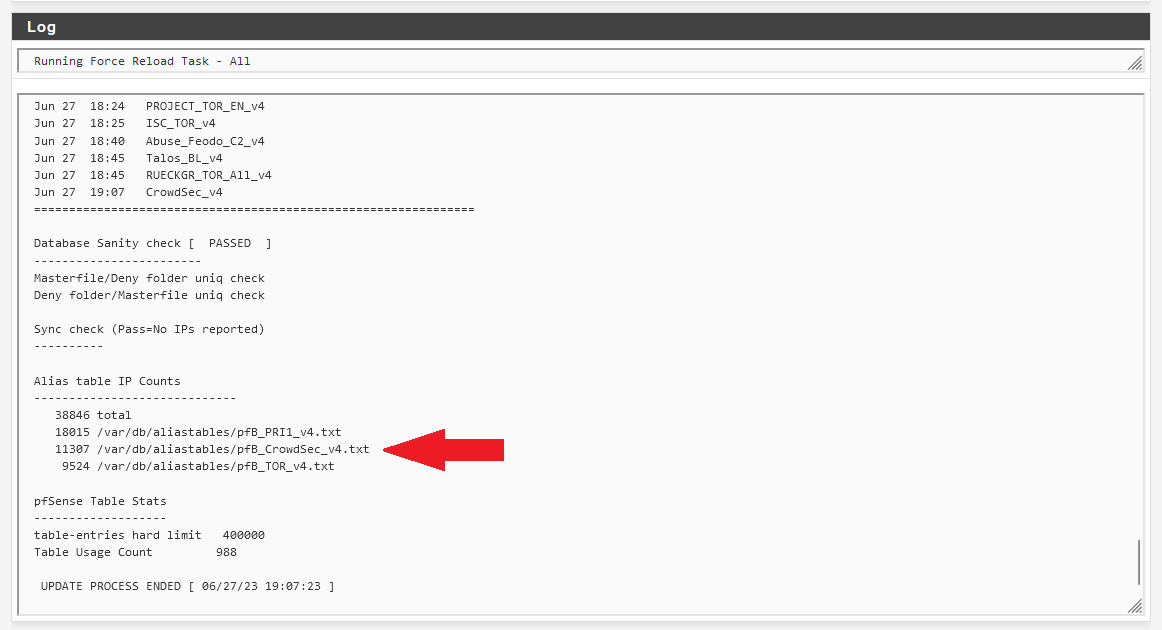
If successful, you will see your block list name in the Alias Table IP Counts in the log outputs.
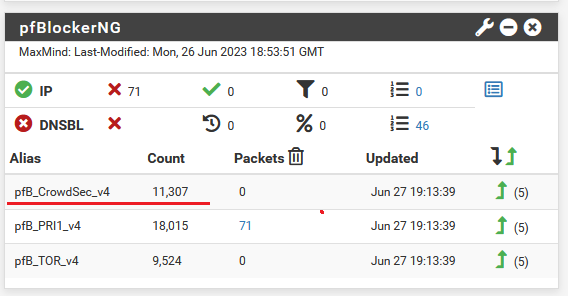
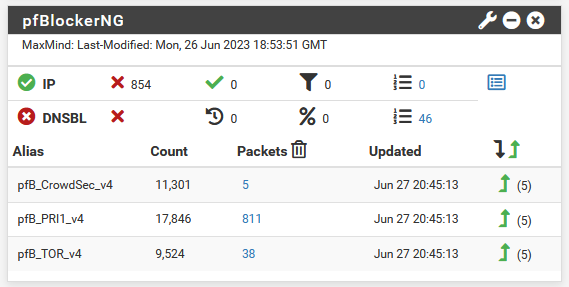
If you have the pfBlockerNG widget in your dashboard, you should see the CrowdSec blocklist being updated with 10k+ counts.
In your WAN interface tab, you should see a new Block auto-rule set by pfBlockerNG, for the CrowdSec list.
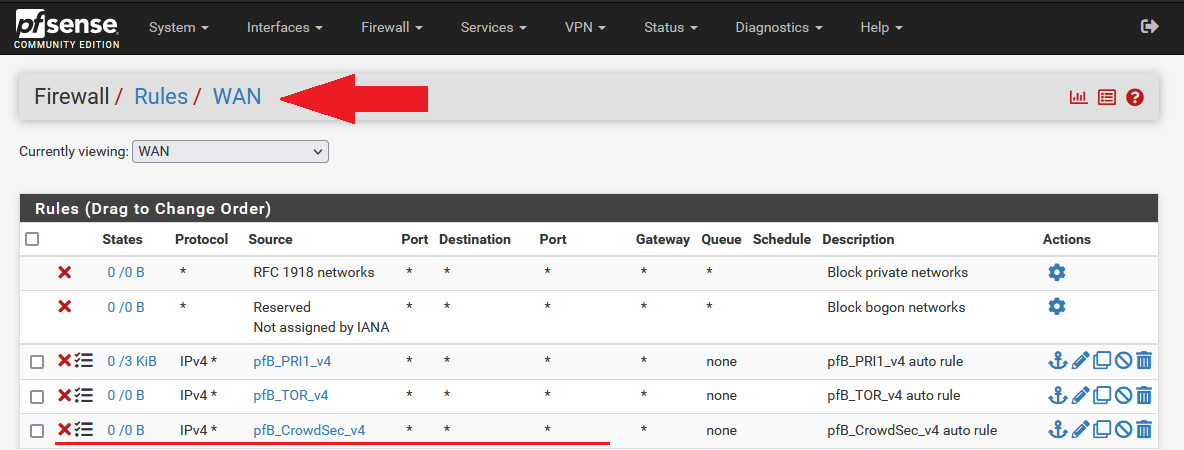
After a while, on my pfSense, there was already packets being blocked.
That's it!
