
Secure Erase for SSD
For SDDs, there is the Secure Erase command that can be use to securely wipe the data on the drive. It is a built-in ATA command designed to completely wipe all data from an SSD at the firmware level. It resets all storage cells to their factory state, ensuring data cannot be recovered.
This is different from HDD wiping, where data is overwritten multiple times to prevent recovery. Since SSDs use flash memory, traditional overwriting methods can be ineffective due to wear leveling and data remapping.
With the Secure Erase command, SSDs can be wiped efficiently while maintaining their longevity, avoiding unnecessary writes.
Warning: The below process will permanently erase all data on the SSD. Ensure you back up any important data before proceeding.
SATA SSDs
For SATA SSDs, we can use the hdparm utility in Linux to issue the Secure Erase command.
hdparm utility comes by default in many Linux distrubution, such as Ubuntu. For Debian, you may need to install it first through the package manager.
Check the existing drive on the system with lsblk, and note the sata device number (sda, sdb, etc)
lsblk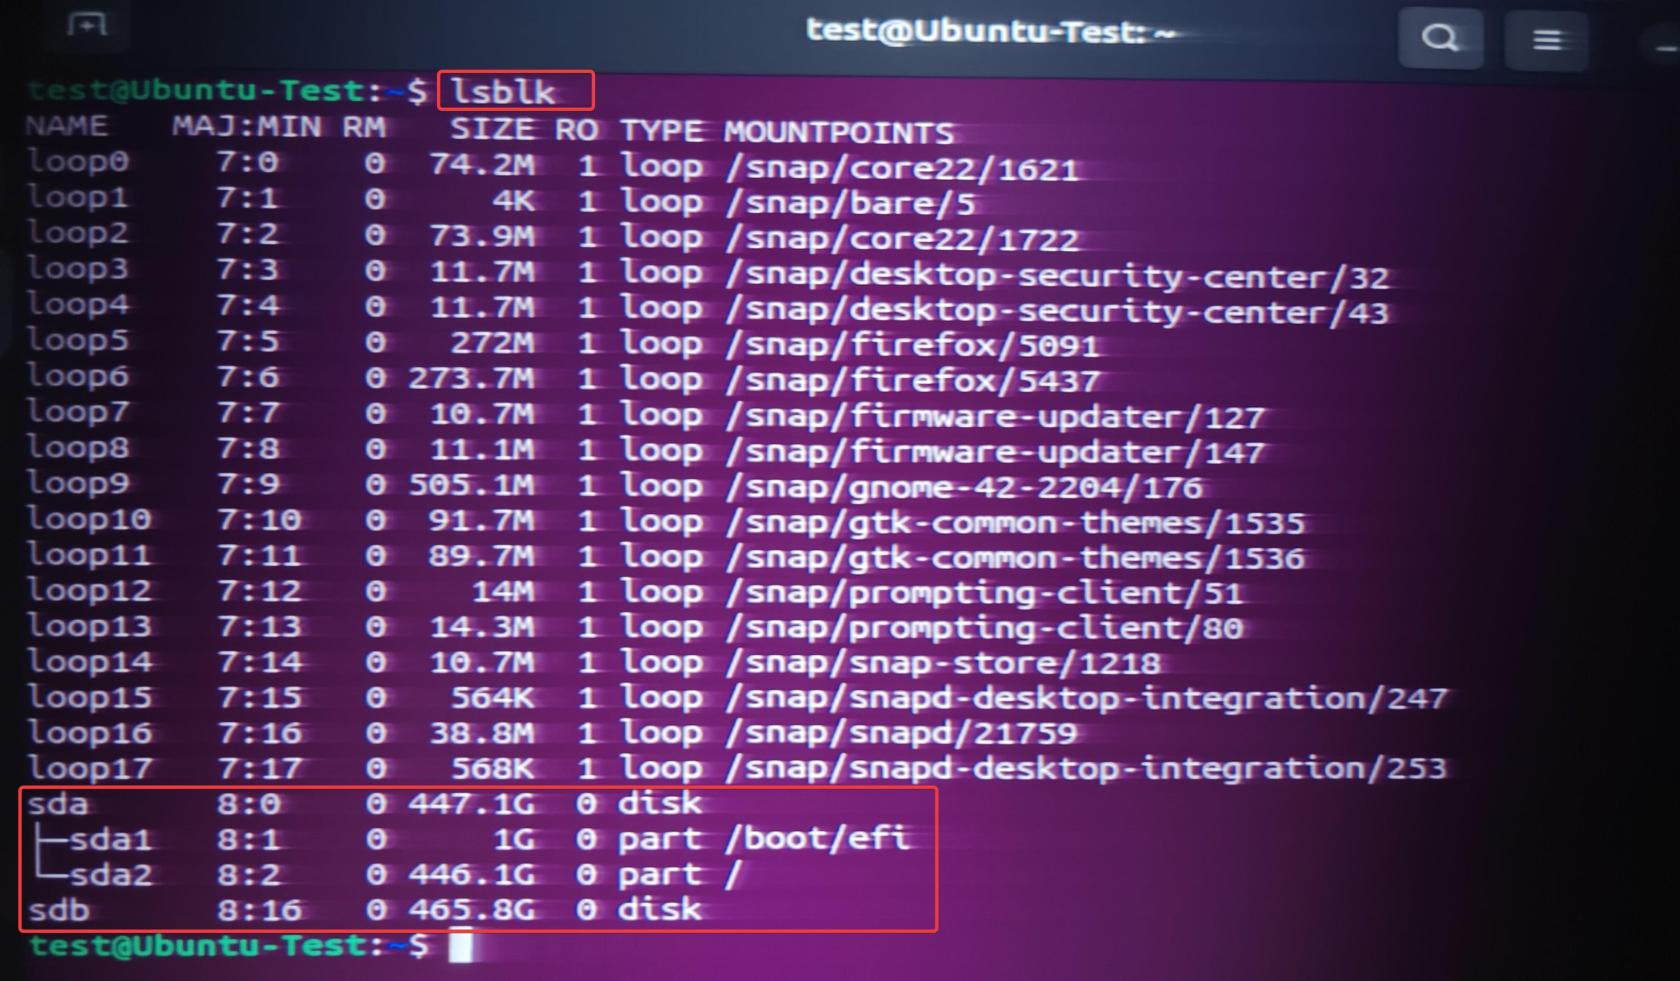
Next, we will run the following command to check on the info on the drive.
sudo hdparm -I /dev/[device identifier]

sudo hdparm -I /dev/sdb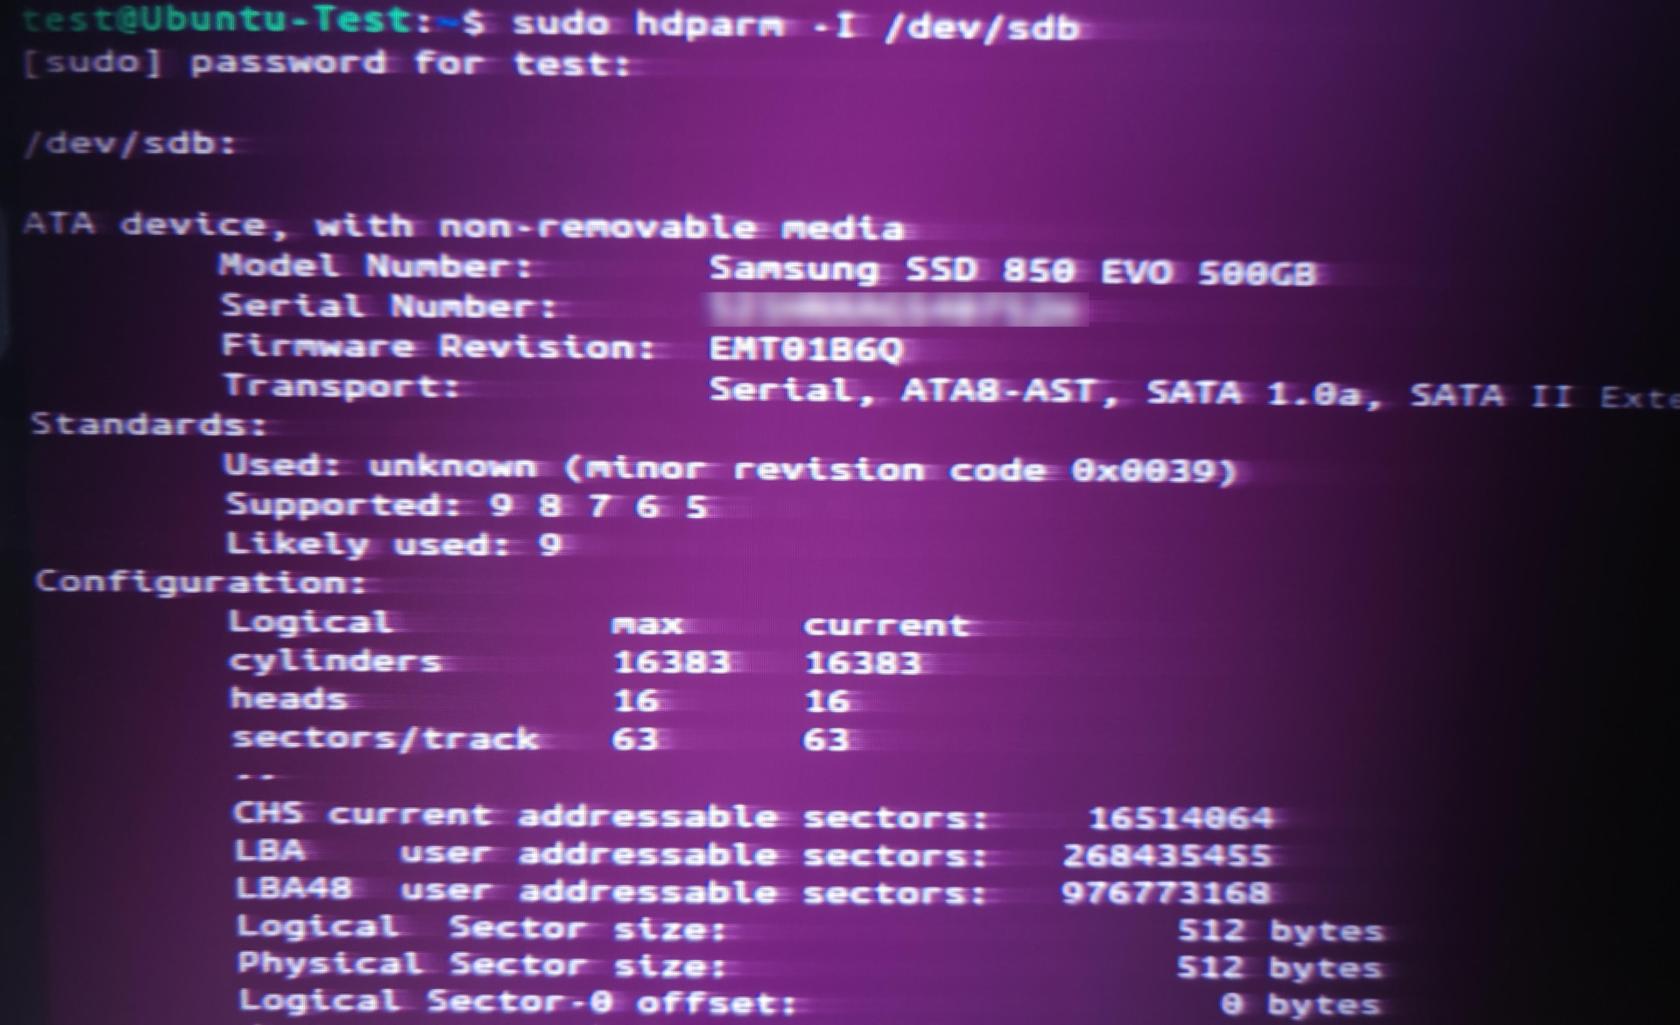
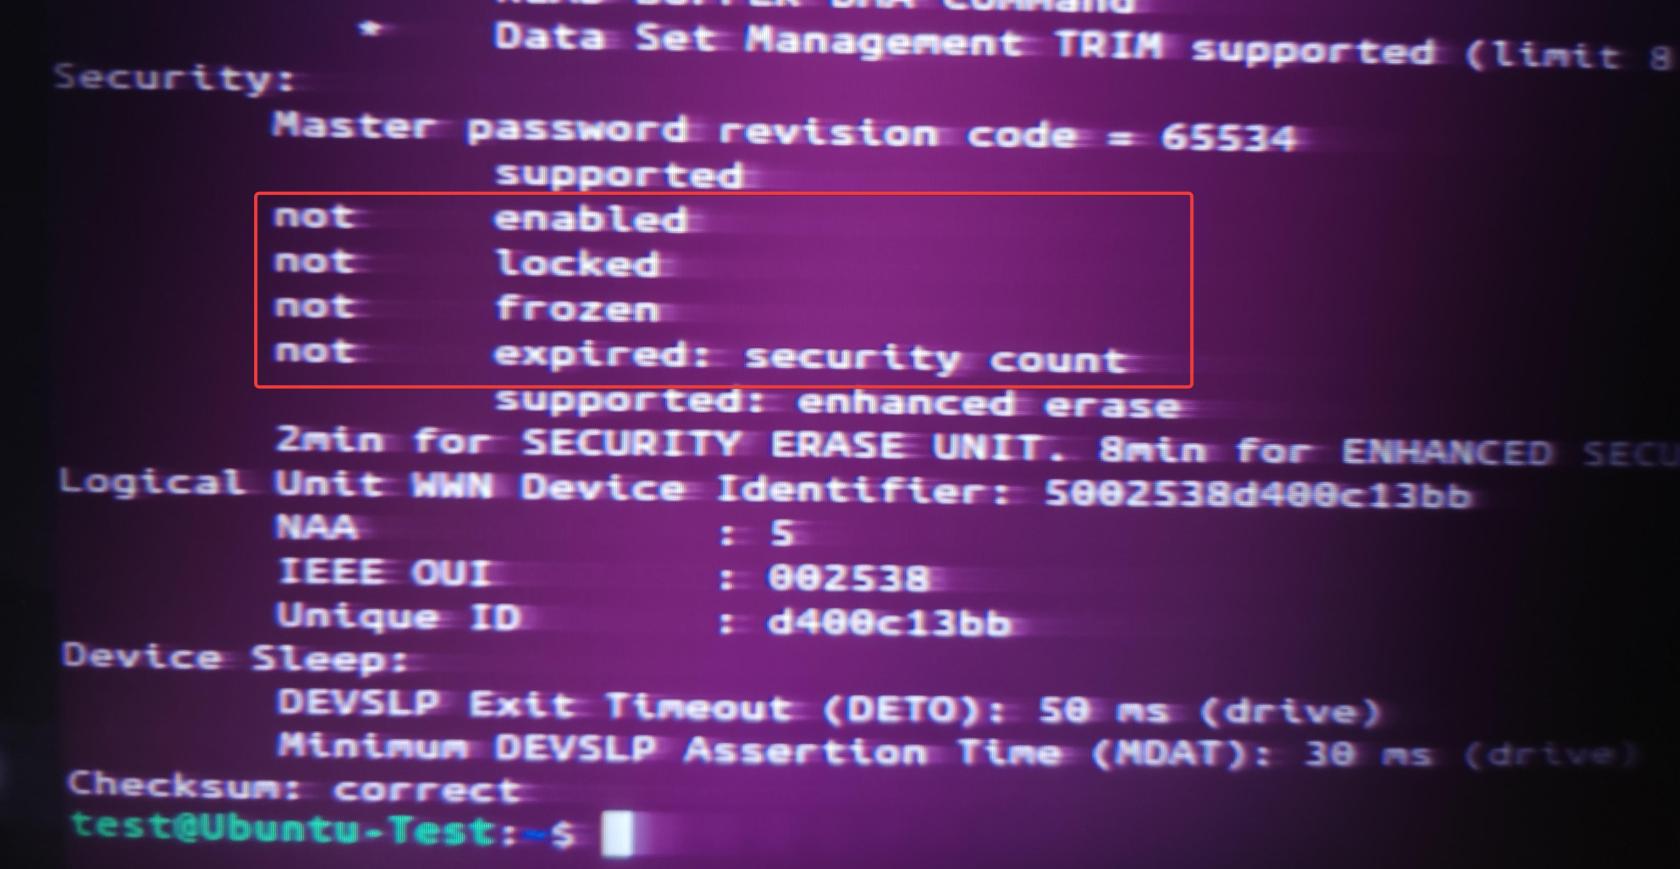
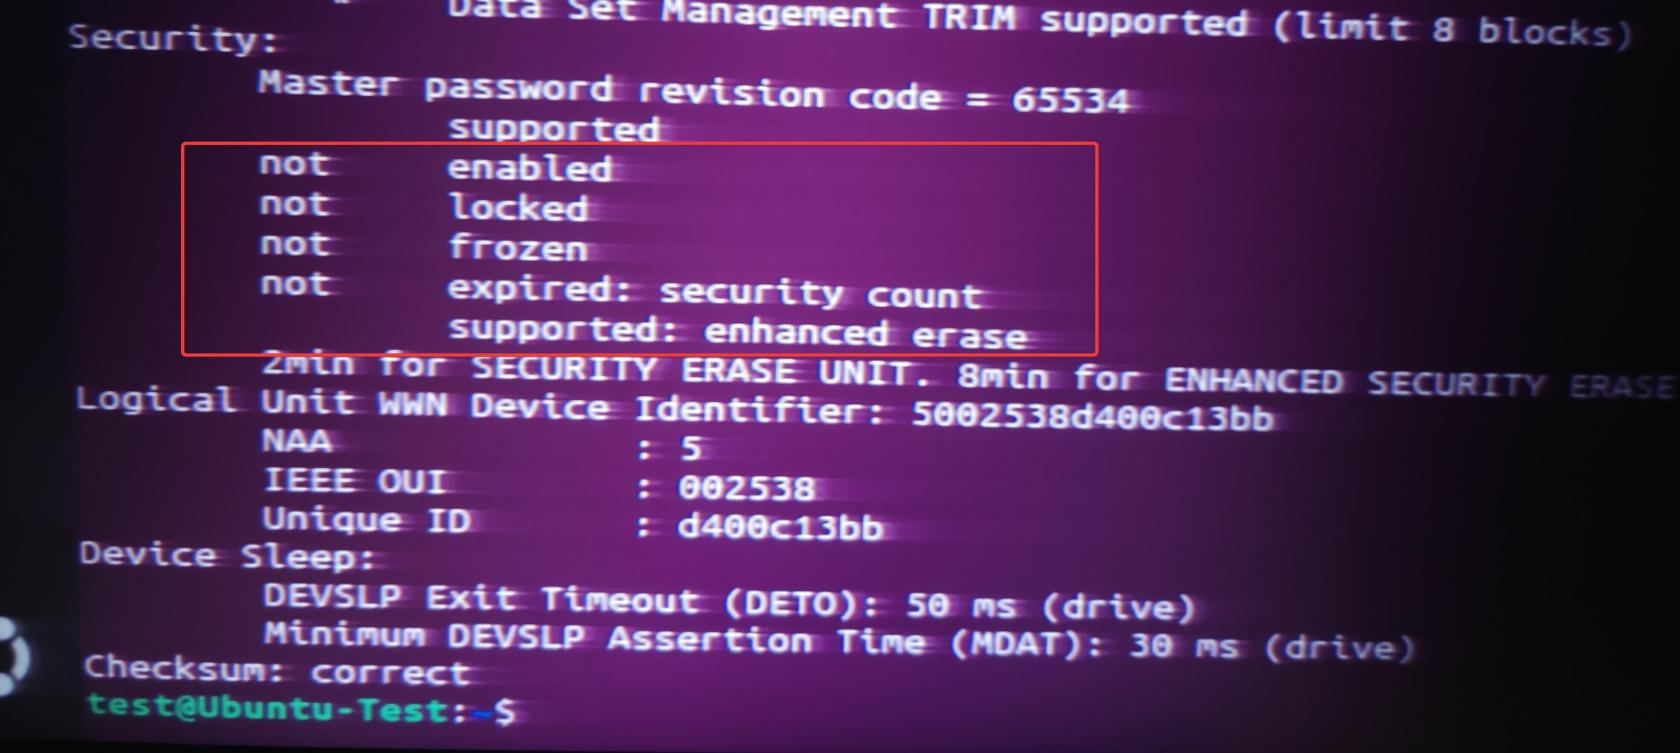
Scroll down to the end of the output.
The main information we want to know is that the drive is NOT enabled, locked, or frozen.
If it is, you may need to reboot your system and try again.
Next, issue the following command, Some SSDs require setting a temporary security password before allowing a Secure Erase. The temp password can be anything, and you do not need to remember it.
sudo hdparm --user-master u --security-set-pass temp_password /dev/[device identifier]

sudo hdparm --user-master u --security-set-pass password /dev/sdb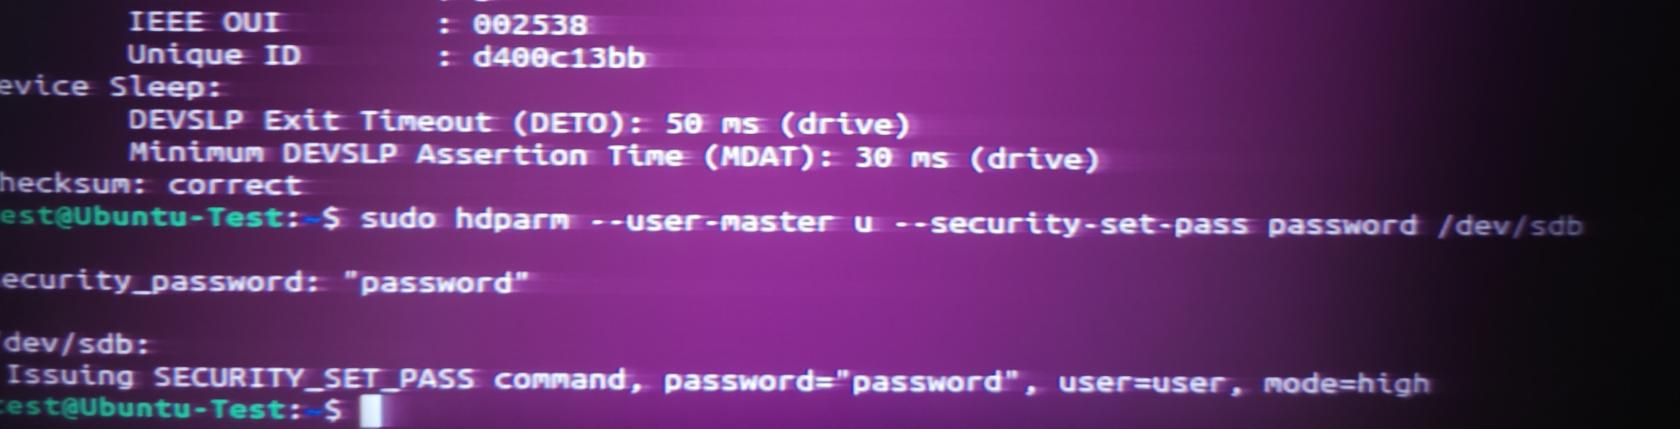
At this point, you can run the hdparm -I command again to see that the drive is now Enabled.

Finally, issue the secure erase command.
sudo time hdparm --user-master u --security-erase temp_password /dev/[device identifier]

sudo time hdparm --user-master u --security-erase password /dev/sdb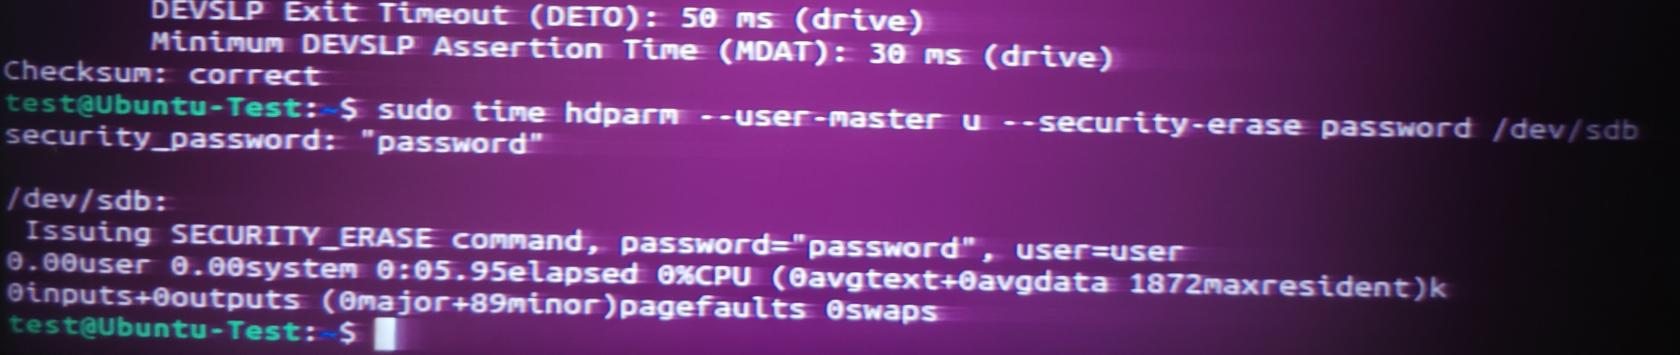
Checking with hdparm -I command, you should see the drive back to NOT enabled.
That's it!