Setting up Out of Band Management Port
For most RouterOS devices, there are usually an extra ethernet port on them, labeled as MGMT. This ethernet port is usually connected connected to the rest of the switch ports by default, on the same bridge. You can configure it to be its own bridge, effectively creating an dedicated Out of Band Management Port.
This setup can be done with any other switch port as well.
Creating a new Bridge and Adding a port to it
Login to the WebGUI. Go to Bridge -> Add New.
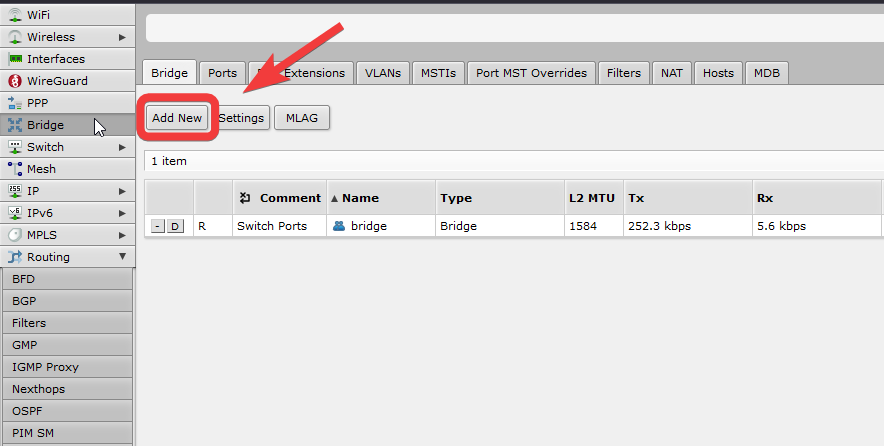
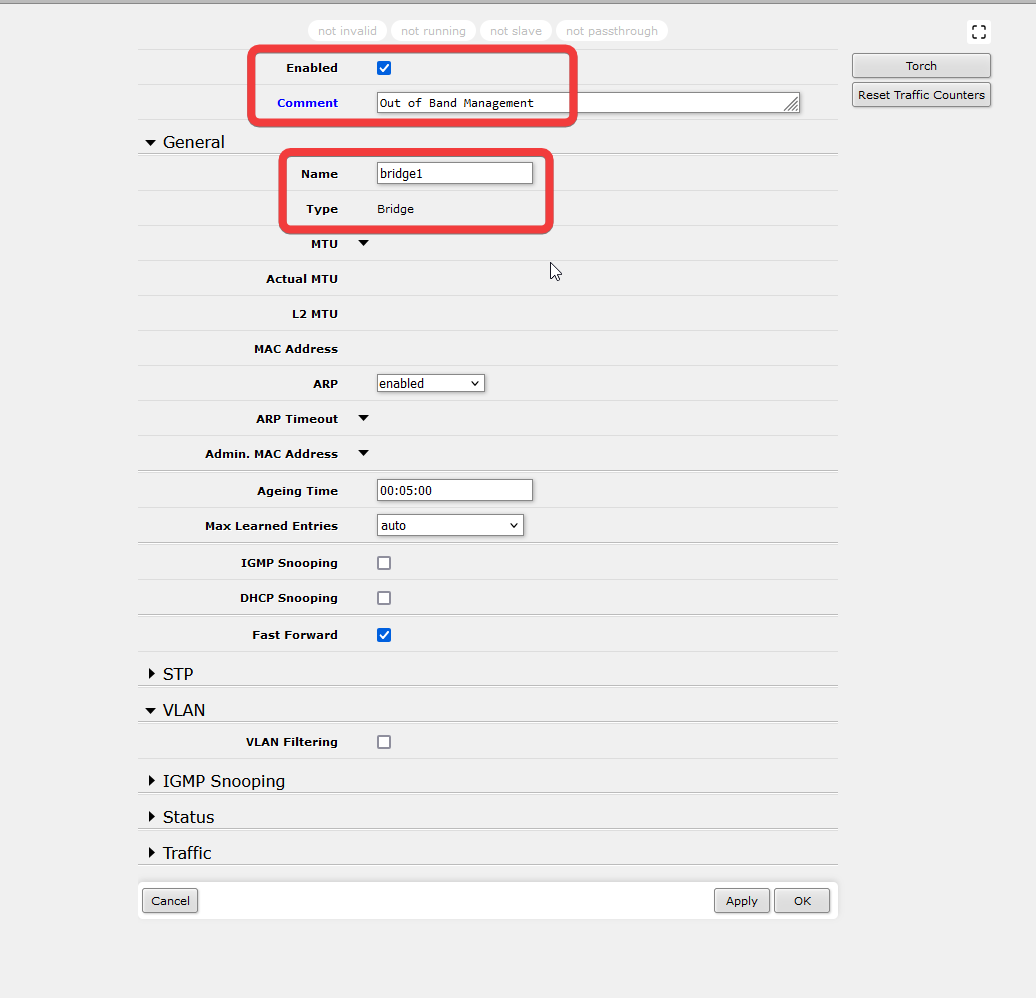
Here, we will add a new bridge. Give the new bridge a name, and describe it in the Comment.
You do not need to worry about the new bridge's mac address yet, as it will be auto generated once you click ok to save the current bridge.
Click Ok.
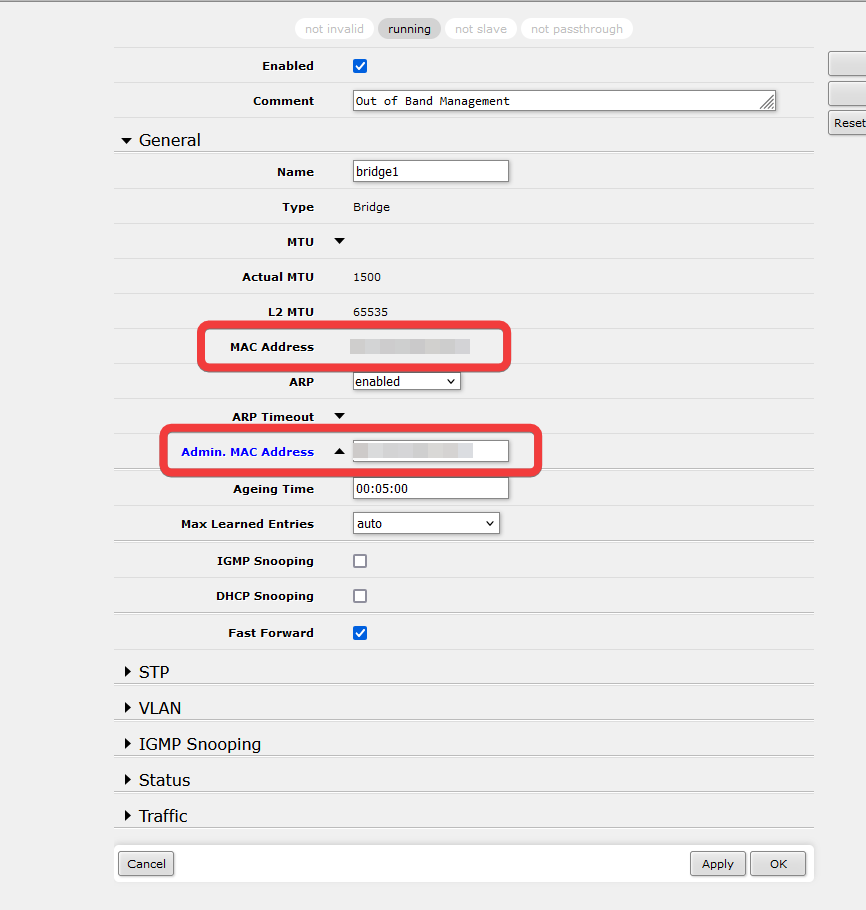
Click on the new bridge again to view the details. This time, you will see that a new mac address has been generated.
This is the mac address that the RouterOS will give to the DHCP server if you plug in a cable to the port.
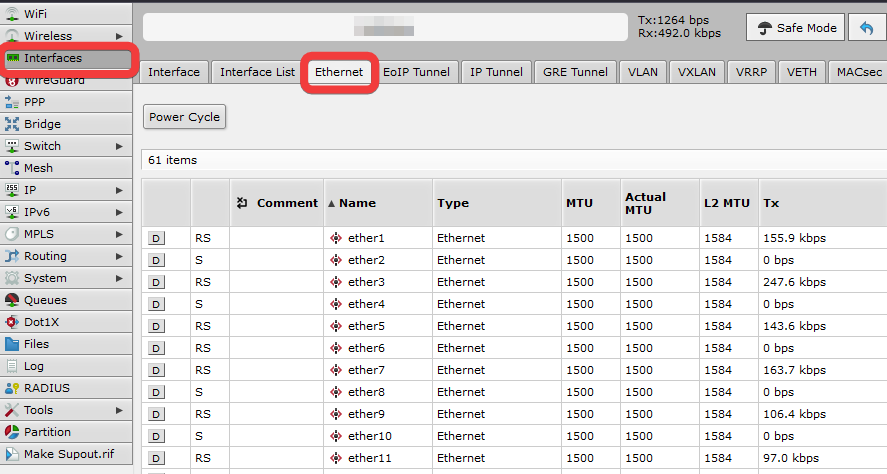
Next, we need to add a port to this bridge. Go to Interfaces -> Ethernet, and find the MGMT port.
It is usually the very last ether port.
Name the port to something that you can easily recognize. for Bridge, set it to the new Bridge that you just created.
Save. You now have an dedicated Out of Band Management Port for your RouterOS device.
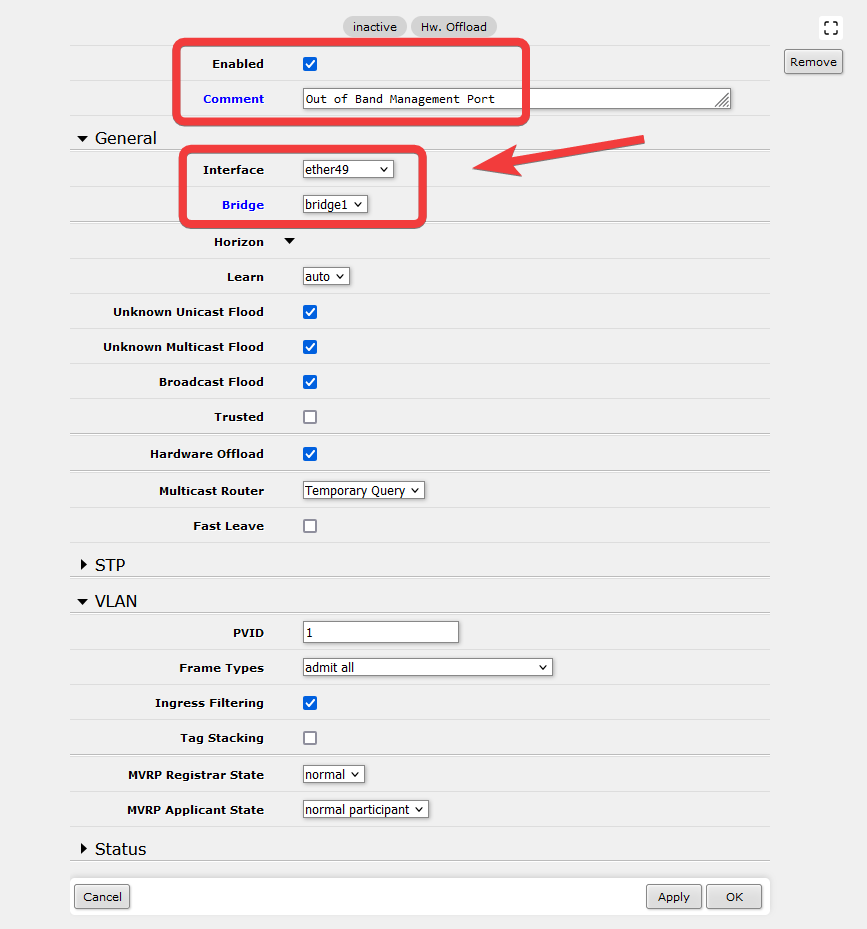
Setting the Bridge as a DHCP Client
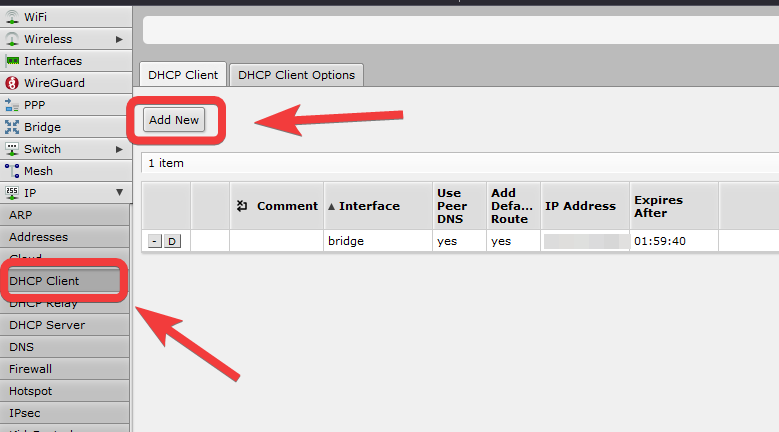
The bridge can be setup as a DHCP client so that it can grab an IP automtically.
Go to DHCP Client -> Add New.
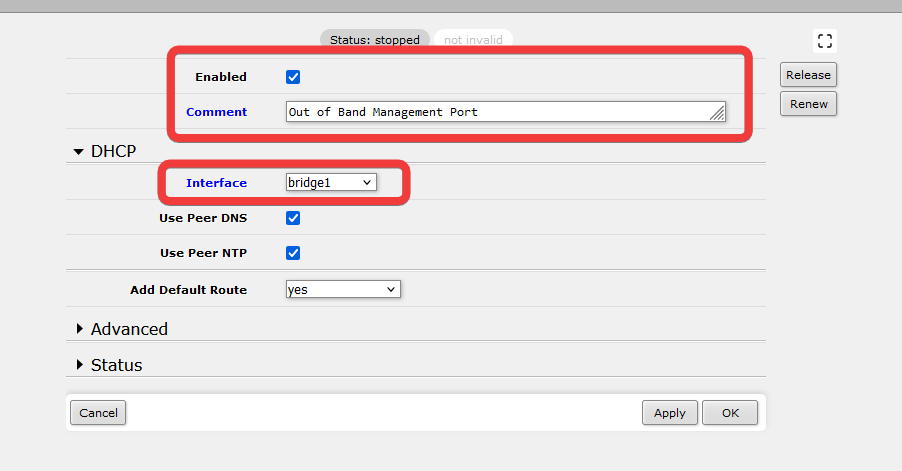
Under the DHCP section, select the Bridge as the interface option.
Click Ok.
You should now see the new DHCP Client entry.
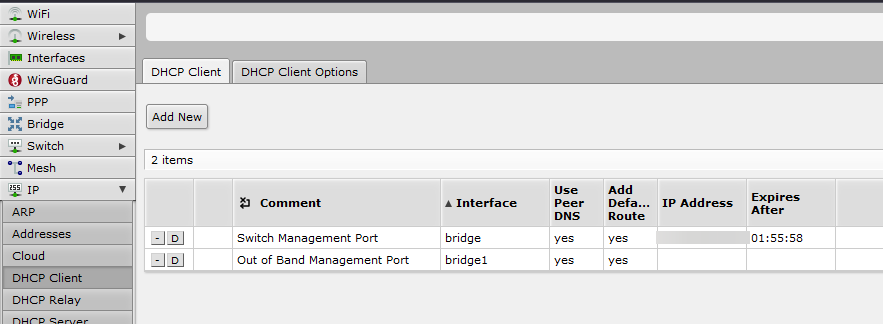
Plug in a cable to the port, and you should see shortly that the new bridge have grab an DHCP IP address.

